


GLT
Unlock the Secrets of Precision Cooking in Canning Jars: Your Ultimate Guide to Safe and Delicious Home Canning
05-20-2025
Welcome to the world of home canning! If you've ever wanted to preserve the fresh flavors of fruits and vegetables, or create delicious jams, pickles, and sauces that last, then you're in the right place. "Precision cooking in canning jars" might sound technical, but it's all about following proven methods to safely preserve food in glass jars. This guide will walk you through everything you need to know, from choosing the right canning equipment to mastering techniques like using a pressure canner. We'll break down complex steps into simple, easy-to-understand instructions, ensuring your home canning adventures are both successful and enjoyable. Whether you're interested in canning tomatoes from your garden or exploring other canning recipes, this article will provide you with the knowledge and confidence to fill jars like a pro. As a factory owner with 7 production lines, exporting to the USA, North America, Europe, and Australia, I, Allen, have seen firsthand the importance of quality glass jars and proper techniques. This article is worth reading because it demystifies the canning process, emphasizes safety, and empowers you to enjoy the rewards of home preservation.
What is "Precision Cooking in Canning Jars" All About?
"Precision cooking in canning jars" essentially refers to the careful and accurate methods used to preserve food in glass canning jars. While the term might bring to mind modern techniques like sous vide cooking (where food in jars is cooked in a precisely temperature-controlled water bath, sometimes using equipment from brands like Anova Culinary), its core principles are deeply rooted in traditional home canning. The "precision" aspect emphasizes following tested canning recipes exactly, paying close attention to processing time, temperature, and preparation steps to ensure food is not only delicious but, more importantly, safe to eat. This means understanding the science behind why we can food – to destroy harmful microorganisms and create an airtight seal that prevents new ones from entering the jar.
At its heart, whether you're using a traditional boiling water bath canner or a pressure canner, precision is key. This includes accurately measuring ingredients, leaving the correct headspace in the jar, ensuring a clean jar rim for a good seal with the lid, and processing for the full recommended cooking time. Every detail matters. For instance, the acidity of the food (its pH level) determines the canning method. High-acid foods like fruits and most tomatoes can be safely processed in a boiling water bath, where the temperature reaches 212°F (100°C). However, low-acid foods such as most vegetables, meats, poultry, and fish require a pressure canner to reach temperatures of 240°F (116°C) or higher. This higher temperature is crucial to destroy Clostridium botulinum spores, which can cause botulism, a potentially fatal illness. The Complete Guide to Home Canning provided by the National Center for Home Food Preservation (NCHFP) is an invaluable resource that outlines these principles. As a manufacturer, I understand that a good can starts with a quality jar, but the process itself demands this precision.

This focus on precision ensures that when you can your food, you're creating a product that will maintain its quality and safety over time. It’s not just about filling a jar; it's about applying scientific principles to food preservation. Using the correct canning equipment, like a reliable canner and properly sealing lids, is part of this precision. Even simple steps, like removing air bubbles before sealing the jar, contribute to a better, safer final product. So, "precision cooking in canning jars" is less about one specific technology and more about a mindset of careful, informed, and methodical food preservation in a jar.
Why Are High-Quality Glass Jars Non-Negotiable for Canning Success?
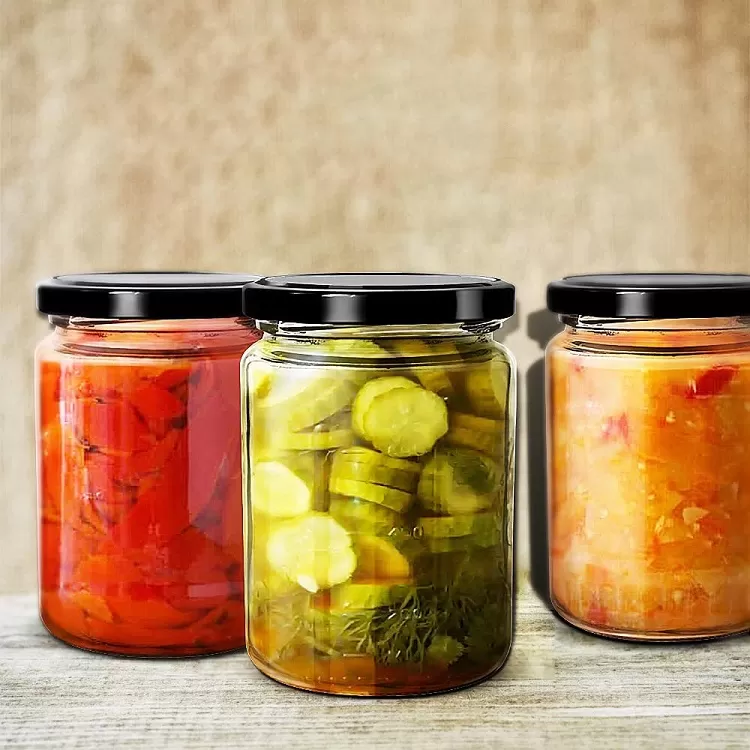
When you decide to can food, the glass jar you choose is more than just a container; it's a critical component of the preservation process. High-quality glass canning jars, often referred to as Mason jars or Ball Jars, are specifically designed to withstand the rigors of both boiling water bath canning and pressure canning. This means they can handle the repeated heating and cooling cycles without cracking or breaking, which is essential when you submerge the jars in boiling water or place them in a pressure canner. The glass must be free of nicks or cracks and tempered to endure the higher temperature and pressure changes. Inferior quality jars, or those not intended for canning, might shatter, leading to lost food, wasted effort, and a potentially dangerous cleanup.
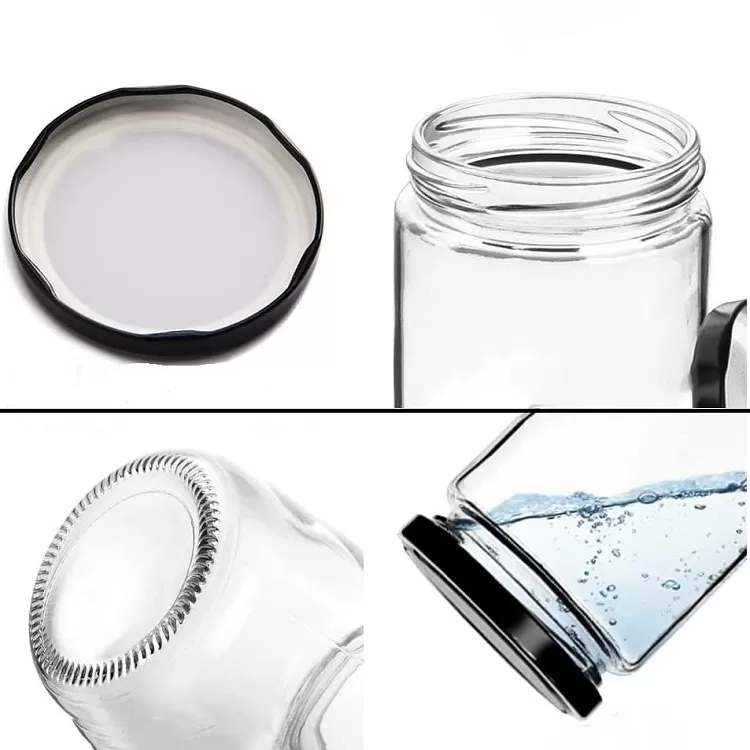
Furthermore, the design of a proper canning jar is crucial for achieving a strong, airtight seal. The jar rims are made to be smooth and even, allowing the sealing compound on the lid to make perfect contact. If the jar rim is flawed, or if the glass is too thin, a proper seal might not form, or it might fail during storage. This would allow bacteria, molds, and yeast to enter the jar and spoil the food. This is particularly critical for low-acid foods processed in a pressure canner, where an imperfect seal could lead to the growth of Clostridium botulinum spores. As someone who manufactures glass jars, I can't stress enough that investing in jars specifically made for canning is a fundamental step towards safe and successful food preservation. We ensure our products, like our versatile 70ml, 150ml, 200ml, 375ml Clear Food Storage Glass Jars, meet these stringent quality standards.
The durability of high-quality glass jars also means they can be reused for many canning seasons. While the flat metal lid needs to be replaced each time you can to ensure a fresh seal, the glass jar itself and the screw band can last for years if cared for properly. This makes them an economical and environmentally friendly choice in the long run. When purchasing, look for jars that are robust, have consistent thickness, and come from reputable manufacturers. Ensuring your canning equipment includes good jars will save you headaches and disappointment, allowing you to confidently fill jars with your preserved bounty. Remember, the success of your canning efforts relies heavily on the integrity of the jar holding your precious food.
What Essential Canning Equipment Do I Need in My Kitchen?
To embark on your home canning journey, you'll need some specialized canning equipment. While you might have some items already, others are specific to the canning process. First and foremost, you'll need glass canning jars with two-piece self-sealing lids (a flat lid with sealing compound and a screw band). These come in various sizes, like pint jars and quart jars, so choose the size jar appropriate for your canning recipes and how you plan to use the preserved food.
Next, you'll need a canner. There are two main types:
- Boiling Water Canner (or Water Bath Canner): This is essentially a large, deep stock pot with a lid and a rack to keep jars off the bottom of the pan and allow water to circulate. It's used for high acid foods like fruits, jams, jellies, and pickles (foods with a pH of 4.6 or lower). The food is heated to 212°F (100°C).
- Pressure Canner: This is a heavy-duty pot with a locking lid, a pressure gauge or weighted gauge, and a safety vent. It's essential for canning low-acid foods like most fresh vegetables (e.g., asparagus, green beans), meats, poultry, and fish. A pressure canner heats food to 240°F or higher, a temperature to kill microorganisms like botulism spores, which cannot be achieved in a boiling water canner. Canning is the only safe method for these low-acid vegetables and meats.
Other useful tools include:
- Jar Lifter: This tool is specifically designed to safely lift hot jars out of the canner.
- Canning Funnel: This wide-mouthed funnel helps you fill jars neatly, without spilling food on the jar rims.
- Bubble Remover/Headspace Tool: A plastic or silicone tool used to remove air bubbles from the jar and measure headspace (the space between the food and the top of the jar).
- Lid Wand: A magnetic tool to lift sterilized lids from hot water.
- Basic kitchen items: Large saucepans for preparing food, ladles, measuring cups and spoons, cutting boards, knives, and kitchen towels.
Having the right canning equipment makes the process smoother, safer, and more enjoyable. It's an investment that pays off in delicious, home-canned goods. Always ensure your pressure canner is in good working order and that you understand the manufacturer’s instructions before you use a pressure canner.
How Should I Prepare My Canning Jars and Lids Before Use?
Proper preparation of your glass canning jars and lids is a critical step for safe and successful home canning. Before you even think about filling them, you need to ensure they are clean and ready for the heat and sealing process. This helps prevent food spoilage and ensures a strong, airtight seal on each jar.
First, inspect all your glass jars carefully. Check for any nicks or cracks, especially around the jar rims. Even a tiny chip can prevent a lid from sealing properly or cause the jar to break during processing in the canner. Discard any damaged jars. Next, wash the jars, screw bands, and lids thoroughly in hot, soapy water. Rinse them well to remove any soap residue. Even new jars should be washed, as they can pick up dust and debris during shipping and storage. Many canning recipes will then instruct you to keep the jars hot until they are filled. This can be done by placing them in your boiling water canner or pressure canner with simmering water (around 180°F), or in a warm oven (around 200°F) or dishwasher on a "sanitize" or "heated dry" cycle. Keeping the jars hot prevents them from breaking when filled with hot food and placed into the hot canner. However, always follow your specific recipe directions regarding jar sterilization or heating, as recommendations can vary based on the processing time. For processing times of 10 minutes or more in a boiling water bath, pre-sterilization of jars is often not required, as the processing itself will sterilize the jar.
The two-piece lids (flat lid and screw band) also need attention. The screw bands can be reused if they are not rusted or dented. Wash them along with the jars. The flat metal lids, however, are for one-time use only. The sealing compound on these lids is designed to create a new seal each time. According to the National Center for Home Food Preservation and most manufacturers, you should prepare the lids according to the manufacturer’s instructions. For many years, this involved simmering them in hot water, but some newer lids may not require this pre-heating. Always check what the current recommendation is for the brand of lids you are using. Do not boil the lids, as this could damage the sealing compound. Once your jars are filled and the lids are applied, the screw band should be tightened only to "fingertip tight." This means tightening it firmly but not excessively, as air needs to escape the jar during processing to create a vacuum seal as it cools.
Water Bath vs. Pressure Canning: Which Method Should I Choose for My Jar?
Choosing the correct canning method for the food you plan to preserve in a jar is paramount for safety. The decision between using a boiling water bath canner (also known as a water bath canner) and a pressure canner depends entirely on the acidity of the food. Acidity is measured by pH, and this determines which microorganisms can survive and grow.
Boiling Water Bath Canning: This method is suitable only for high acid foods. These are foods that have a pH of 4.6 or lower. Examples include:
- Most fruits (apples, berries, peaches, pears)
- Jams, jellies, and preserves (which usually contain fruit and added acid like lemon juice)
- Pickles and relishes (which are acidified with vinegar)
- Tomatoes, though some varieties may require added acid (like lemon juice or citric acid) to ensure they are safely within the high-acid range. Always follow tested recipes for canning tomatoes.
In a boiling water bath, jars filled with food are completely submerged in boiling water (212°F or 100°C at sea level) for a specified processing time. This temperature is sufficient to destroy molds, yeasts, and some bacteria in high-acid environments. The rack in the canner keeps the jars without direct contact with the bottom of the pan.
Pressure Canning: This method must be used for low-acid foods. These are foods with a pH greater than 4.6. Examples include:
- All plain fresh vegetables (like asparagus, carrots, green beans, corn, potatoes) except for those specifically formulated as acidified pickles.
- Meats, poultry, and fish
- Soups and stews containing low-acid vegetables or meats.
Clostridium botulinum bacteria, which produce a deadly toxin causing botulism, can thrive in low-acid foods if they are not processed correctly. These bacteria form spores that are not killed at 212°F. A pressure canner creates steam under pressure, allowing the temperature inside the canner to reach 240°F (116°C) or higher. This higher temperature is necessary to destroy these resilient spores. Pressure canning is the only safe way to preserve these low-acid foods at home. When you use a pressure canner, you are ensuring that these potentially harmful spores are eliminated. Trying to can low-acid foods in a boiling water canner is dangerous and can lead to serious illness. Always consult reliable sources like the National Center for Home Food Preservation or your local Cooperative Extension office for research-based canning guidelines.
For Which Foods is Using a Pressure Canner Absolutely Necessary?
Using a pressure canner is not just a suggestion for certain foods; it's an absolute safety requirement. As mentioned, the primary concern with low-acid foods is the potential for Clostridium botulinum spores to survive and produce deadly toxins. These spores can only be reliably destroyed by reaching temperatures of 240°F (116°C) or higher, which can only be achieved in a home kitchen using a pressure canner. A boiling water bath canner, which heats food to 212°F (100°C), is insufficient for these foods.
So, when must you use a pressure canner? The rule is straightforward: for all low-acid foods. This category includes:
- All plain vegetables: This means canning vegetables like asparagus, beans (green, wax, lima), beets, carrots, corn, peas, potatoes, pumpkin, squash, and spinach. The only exception is if these vegetables are properly acidified in a tested pickle recipe.
- Meats: All types of red meat (beef, venison, pork, lamb), poultry (chicken, turkey), and game meats.
- Fish and Seafood: All types of fish and shellfish.
- Soups and Stews: Any mixed recipes that contain low-acid vegetables or meats. Even if a soup contains some acidic ingredients like tomatoes, the overall pH might still be in the low-acid range if it also includes items like corn, beans, or meat.
- Stocks and Broths: Meat and vegetable stocks.
It's crucial to understand that attempting to can these low-acid foods using a boiling water bath method is extremely dangerous. The risk of botulism is very real. Botulism is a severe form of food poisoning that can cause paralysis and even death. The toxin is odorless and tasteless, so you cannot tell if a food is contaminated simply by looking at or smelling it. Therefore, if you plan to preserve any of the foods listed above in a jar, investing in and correctly using a pressure canner is non-negotiable. Always follow tested recipes from reliable sources like the National Center for Home Food Preservation (NCHFP) or your local State Extension office, as these recipes specify the correct processing time and pounds pressure for the specific food and size jar being used. Remember, when it comes to low-acid foods, canning is the only safe method using a pressure canner.
Can You Walk Me Through Using a Pressure Canner Safely with Glass Jars?
Using a pressure canner might seem intimidating at first, but by following the steps carefully, you can safely preserve low-acid foods in glass jars. Always begin by reading the manufacturer’s instructions for your specific model of pressure canner, as there can be slight variations. Here's a general guide:
-
Preparation is Key:
- Ensure your pressure canner is in good working condition. Check the rubber gasket (if applicable) for cracks or wear, and ensure the vent pipe is clear. If you have a dial gauge, get it tested for accuracy annually by your local extension office.
- Prepare your glass canning jars and lids as previously discussed (clean, inspect, keep hot).
- Prepare your food according to a tested recipe. This includes precooking if required and having it hot when you fill the jars.
-
Filling and Closing Jars:
- Use a canning funnel to fill jars with the prepared food, leaving the amount of headspace specified in your recipe directions (usually 1 to 1 ½ inches for low-acid foods).
- Remove air bubbles by sliding a non-metallic spatula or bubble remover tool around the inside of the jar.
- Wipe the jar rims clean with a damp cloth to ensure a good seal.
- Place the flat lid on the jar and apply the screw band until "fingertip tight." Do not overtighten.
-
Loading the Canner:
- Place the rack in the pressure canner. Add the amount of hot water specified in your canner's manual (usually 2-3 inches of hot water). The water level is important.
- Carefully put the jars onto the rack using a jar lifter. Ensure they are not touching each other, allowing steam to circulate.
- Fasten the canner lid securely according to the manufacturer's directions.
-
Venting the Canner:
- Turn the heat to high. Leave the vent port (or petcock) open.
- Once a steady, strong funnel of steam begins to escape from the vent port, begin timing. Vent the canner for 10 minutes (unless your canner manual directs otherwise). This step is crucial to remove air from the canner so the temperature is uniform.
-
Pressurizing and Processing:
- After venting, close the vent port or place the weighted gauge on it.
- Allow the pressure to build to the level specified in your tested recipe (e.g., 10 or 15 pounds pressure, depending on your altitude and the food). Adjust the heat to maintain this pressure steadily.
- Once the correct pressure is reached, begin timing the processing time as per your recipe for the specific food and size jar. For example, canning vegetables like green beans in pint jars might take 20 minutes at 10 pounds pressure (at altitudes up to 1,000 ft).
-
Cooling and Depressurizing:
- When the processing time is complete, turn off the heat.
- Let the pressure canner cool down naturally until the pressure gauge reads zero (or the air vent/cover lock drops). Do not try to rush cooling by running cold water over the canner or opening the vent. This could cause jars would to break or food to be siphoned out.
- Once fully depressurized, wait a few more minutes, then carefully remove the weighted gauge or open the petcock.
- Unlock and remove the canner lid, tilting it away from you to avoid steam burns.
-
Removing and Cooling Jars:
- Let the jars sit in the open canner for about 10 minutes to adjust to the cooler temperature. This is an optional step some recommend to prevent liquid loss from jars.
- Using a jar lifter, carefully remove the hot jars and place them upright on a kitchen towel or cooling rack in a draft-free area. Leave at least an inch of space between jars.
- Do not retighten screw bands at this point. Let the jars cool undisturbed for 12 to 24 hours. You should hear the satisfying "pop" of the lids sealing as they cool.
Following these steps diligently ensures that your low-acid foods are processed in a pressure canner safely, reaching the necessary 240°F to destroy harmful spores. Remember, when you use a pressure canner, precision and adherence to manufacturer’s instructions and tested recipes are vital.
What Common Pitfalls Should I Avoid When Pressure Canning in Jars?
While pressure canning is a safe method for preserving low-acid foods when done correctly, several common mistakes can lead to spoiled food, seal failures, or even safety hazards. Being aware of these pitfalls can help you achieve successful results every time you can in a jar.
- Not Following a Tested Recipe: This is perhaps the most critical error. Always use current, tested recipes from reliable sources like the National Center for Home Food Preservation (NCHFP) or your local Cooperative Extension service. These recipes have been scientifically tested to ensure they destroy harmful microorganisms. Don't invent your own canning recipes for low-acid foods or alter processing times or pressures.
- Incorrect Canner Operation:
- Forgetting to Vent: Failing to vent the pressure canner for the recommended 10 minutes before pressurizing can trap air inside, leading to a lower internal temperature than indicated by the gauge. This means the food may not reach the safe 240°F.
- Fluctuating Pressure: Not maintaining a steady pressure during the processing time can result in under-processing. If the pressure drops below the target, you must bring it back up and restart the timing from the beginning for the full duration.
- Forced Cooling: Rapidly cooling the pressure canner (e.g., by placing it under cold water or opening the vent too soon) can cause liquid to siphon out of the jars (loss of liquid), seal failures, or even jar breakage.
- Jar Preparation Errors:
- Using Damaged Jars or Lids: Always inspect glass jars for nicks or cracks and ensure lids are new and undamaged.
- Incorrect Headspace: Too little headspace can cause food to bubble out during processing, preventing a proper seal. Too much headspace might prevent all the air from being driven out of the jar, also affecting the seal. Follow recipe directions for the correct headspace for the food you can.
- Dirty Jar Rims: Any food particles left on the jar rims can interfere with the lid sealing. Wipe jar tops clean before applying lids.
- Overtightening Screw Bands: Screw bands should only be "fingertip tight." Overtightening can prevent air from escaping during processing, which is necessary for a vacuum seal to form, or can even cause lids to buckle.
- Ignoring Altitude Adjustments: Processing times and pressures for canning are typically given for altitudes at or below 1,000 feet. If you live at a higher altitude, you must adjust the pounds pressure (for pressure canning) or processing time (for boiling water bath canning) according to established guidelines. Water boils at a lower temperature at higher altitudes, and pressure is also affected.
- Assuming All "Canning Jars" Are Equal: While many glass jars are marketed for canning, stick to reputable brands known for quality. Low-quality jars may not withstand the thermal stress of the canner. At Glint Glass Bottle, we pride ourselves on producing durable High Borosilicate Marijuana Glass Bottles (suitable for various storage needs due to their robust nature) and other food-grade jars that meet international safety standards, ensuring they can handle the demands of proper canning processes.
By avoiding these common mistakes, you significantly increase your chances of safe and successful pressure canning, resulting in delicious, shelf-stable food in your jar.
How Do I Check if My Canning Jars Have Sealed Correctly and How Should I Store Them?
After you've carefully processed your glass jars in the canner and let them cool undisturbed for 12 to 24 hours, the next crucial step is to check if they have sealed properly. A correct seal is vital because it indicates that a vacuum has formed inside the jar, preventing air and microorganisms from entering and spoiling the food.
There are three main ways to check the seal on a two-piece lid system:
- Listen for the "Pop": As the jars cool, you'll often hear a distinct popping sound. This is a good initial sign that the lid is sealing, but you should still perform a physical check.
- Examine the Lid: Once cooled, the center of the flat lid should be concave (curved downward). It should not flex up and down when pressed in the center. If the lid is flat or bulging, it has not sealed.
- Tap the Lid: Gently tap the center of the lid with a spoon. A sealed lid will produce a clear, ringing sound. A dull sound may indicate an unsealed jar.
After 24 hours, remove the screw bands from the sealed jars. Wash the jars and lids to remove any food residue that might have been pushed out during processing, as this can attract insects or allow mold to grow on the outside of the jar. Label each jar clearly with the contents and the date it was canned. This helps you keep track of your inventory and use the oldest foods first. If a jar has not sealed, you have a few options:
- Re-process: You can re-process the unsealed jar within 24 hours. Empty the jar, check the jar rim for nicks, use a new lid, and re-process for the full recommended processing time. The quality of the food may be slightly reduced due to the second heating.
- Refrigerate: Store the unsealed jar in the refrigerator and use the contents within a few days.
- Freeze: You can also freeze the contents if the food is suitable for freezing (ensure there's enough headspace in a freezer-safe container).
Proper storage is just as important as proper canning. Store your sealed glass jars in a cool, dark, and dry place. Ideal temperatures are between 50°F and 70°F. Avoid storing them near heat sources like stoves or furnaces, or in direct sunlight, as this can cause the food to lose quality or even spoil. Do not store jars with the screw bands on once they are sealed and cleaned. If a lid becomes unsealed during storage, the screw band can hold it in place, potentially masking spoilage and creating a "false seal." Storing jars without the bands allows you to easily notice if a seal has failed. Properly canned and stored food can last for a year or more, providing you with delicious, home-preserved goodness. Remember, the integrity of the jar and the seal are paramount for long-term storage.
Beyond the Pantry: What Else Can I Do With Versatile Glass Canning Jars?
While the primary purpose of glass canning jars is, of course, to can and preserve food, their versatility extends far beyond the pantry shelves. Their robust construction, classic aesthetic, and various sizes make them incredibly useful for a multitude of applications around the home and even for small businesses. As a manufacturer, I've seen customers use our glass jars in wonderfully creative ways.
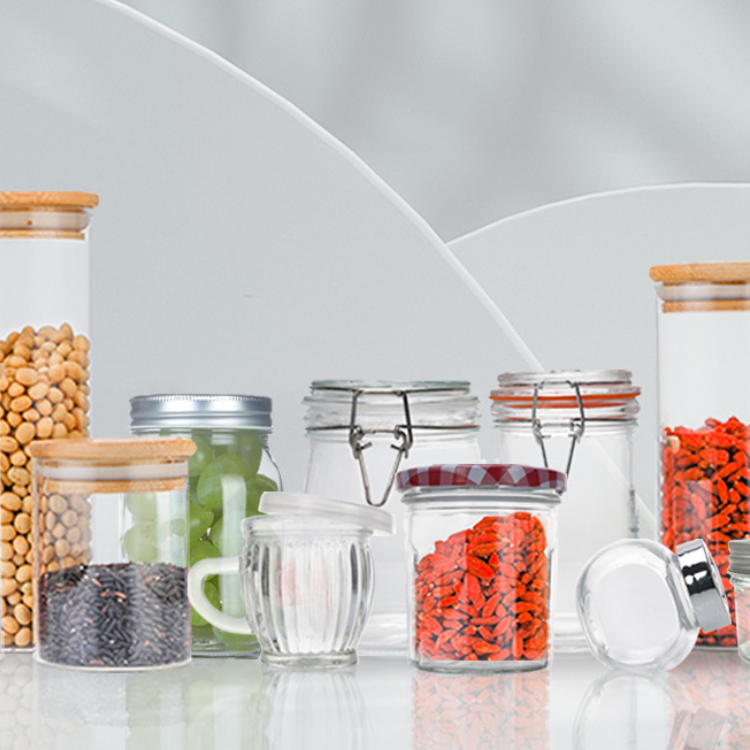
- Dry Food Storage: Glass jars are perfect for storing dry goods like pasta, rice, beans, flour, sugar, coffee, tea, and spices. The airtight seal (even with a regular storage lid, not necessarily a canning lid for this purpose) helps keep food fresh and protects it from pests. Clear glass allows you to easily see the contents. Our 100ml Mini Square Glass Spice Jar is a great example for organizing your spice collection.
- Meal Prep and Leftovers: Pint and quart size jars are excellent for storing pre-prepped ingredients, salads (layer them for freshness!), soups, and leftovers in the refrigerator. They are a great alternative to plastic containers.
- Drinking Glasses and Mugs: The rustic charm of a canning jar makes it a popular choice for serving beverages, from iced tea and lemonade to smoothies and even cocktails. Some jars come with handles, making them convenient mugs.
- Organization and Craft Storage: Small glass jars are ideal for organizing small items in your craft room (buttons, beads, glitter), workshop (nails, screws, washers), or bathroom (cotton balls, Q-tips).
- DIY Gifts and Favors: Fill a jar with homemade cookies, candies, bath salts, or a layered dry soup mix for a thoughtful and attractive gift. They are also popular for wedding or party favors.
- Home Décor: Glass canning jars can be transformed into beautiful decorative pieces. Use them as vases for fresh vegetables or flowers, candle holders (ensure safety precautions), terrariums, or part of a rustic centerpiece.
- Lunch Containers: Pack your lunch in a jar! Layered salads, yogurt parfaits, or noodle dishes travel well and look appealing.
- Fermenting: Many people use glass jars for small-batch fermentation projects like making sauerkraut, kimchi, or kombucha. Special airlock lids are available for this purpose.
- Starting Seeds: Smaller jars can be used as mini-greenhouses to start seeds for your garden.
The durability and reusability of glass jars make them an eco-friendly and practical choice for countless uses. When you invest in high-quality glass canning jars, you're not just getting a container for your canned goods; you're acquiring a versatile tool that can serve many purposes. As a supplier, Glint Glass Bottle (https://www.gltglassbottle.com/) is proud to offer a wide range of glass jars that meet the diverse needs of our customers, from home canners to businesses looking for reliable packaging solutions. The humble jar is truly a powerhouse of utility!
Key Takeaways for Successful Precision Cooking in Canning Jars:
- Understand "Precision": It means meticulously following tested canning recipes and procedures for safety and quality, whether using a water bath or pressure canner.
- Choose Quality Jars: Use glass canning jars specifically designed for the thermal stress of canning to prevent breakage and ensure a good seal with the lid.
- Acquire Essential Equipment: You'll need a canner (boiling water or pressure, depending on food acidity), jars, lids, a jar lifter, and a canning funnel.
- Proper Preparation: Always inspect and clean jars and lids. Follow manufacturer’s instructions for lid preparation and keep jars hot if required by your recipe.
- Know Your Canner Type: Use a boiling water canner for high acid foods (pH 4.6 or lower) and a pressure canner for low-acid foods (pH above 4.6) like most vegetables and meats to prevent botulism.
- Pressure Canner is a Must for Low-Acid: Canning is the only safe method for low-acid foods using a pressure canner to reach 240°F.
- Follow Pressure Canner Steps Carefully: This includes venting, maintaining correct pressure, and allowing natural cooling to ensure food safety and jar integrity.
- Avoid Common Mistakes: Don't deviate from tested recipes, ensure proper canner operation, pay attention to headspace and jar rims, and adjust for altitude.
- Check Seals and Store Properly: Ensure lids are concave and sealed. Store canned goods in a cool, dark, dry place without screw bands.
- Versatility of Jars: High-quality glass jars can be used for much more than canning, including dry storage, meal prep, and DIY projects.