


GLT
How to Source Glass Liquor Bottles at Scale: Supplier Vetting, MOQs, Lead Times, and Quality Checks
06-03-2026
How to Source Glass Liquor Bottles at Scale: Supplier Vetting, MOQs, Lead Times, and Quality Checks
Sourcing Glass Liquor Bottles at scale can seem straightforward until the real costs appear. Freight surprises, sample delays, closure mismatches, breakage, and compliance questions can quickly outweigh a low unit price. Catalog appearance and bottle cost matter, but they should not drive the decision alone. A stronger purchase process starts with total landed cost, then checks operational fit, supplier reliability, and quality controls. This approach helps buyers compare options more accurately and avoid packaging issues that disrupt production, delivery, or market readiness.
Prerequisites Before Buying Glass Liquor Bottles Wholesale
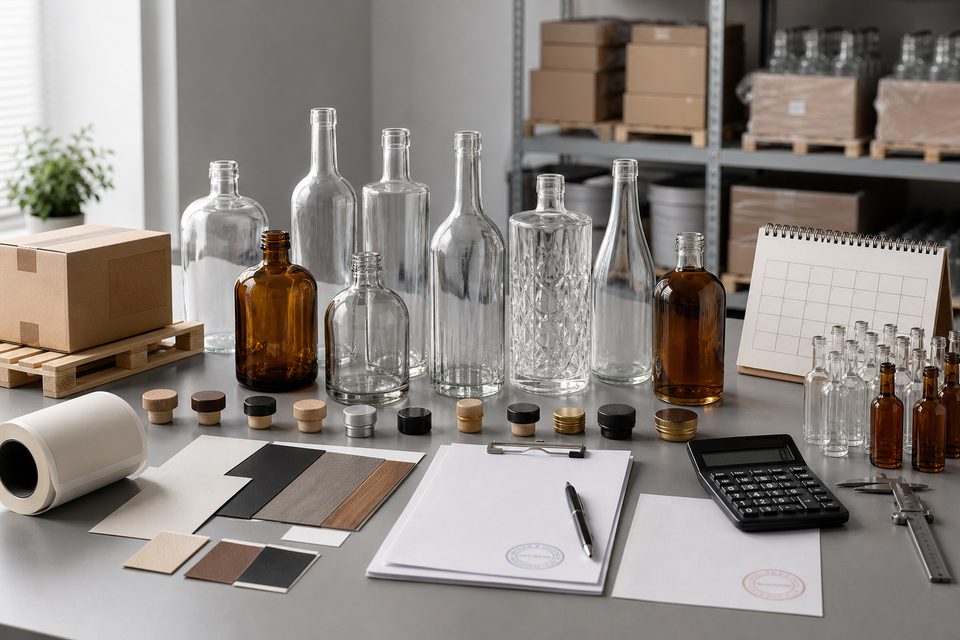
The cheapest bottle on a supplier’s price sheet can become your most expensive procurement decision. Unit price is only one variable. Total landed cost – breakage, freight density, closure compatibility, relabeling labor, warehousing, duties, and chargebacks – is the number that hits your P&L.
Before you request quotes for Glass Liquor Bottles, put the fundamentals in place. A clear spec, tested closure plan, receiving capacity, and compliance checklist can save weeks of back-and-forth. They also reduce the risk of buying bottles your line, warehouse, or retail channel cannot use.
The Real Cost Equation
Most buyers compare unit price and MOQ. Procurement teams that avoid expensive surprises compare total landed cost per filled, shelf-ready bottle. That calculation should cover every cost required to move the bottle through receiving, filling, labeling, packing, and distribution.
Build your cost model around these line items:
- Unit bottle cost: glass only
- Closures: cork, bar-top, T-top, screw cap, or tamper-evident closure
- Decoration and labeling: paper labels, pressure-sensitive labels, shrink sleeves, or direct print
- Freight: glass is heavy and fragile; a pallet of 750 mL bottles runs 1,000-1,400 lbs
- Breakage allowance: budget for the common 1-3% in-transit loss
- Duties and brokerage: required for imported glass
- Sample costs: often $50-$300 per SKU plus shipping, sometimes refundable on the first order
- Tooling: required for custom molds or proprietary bottle shapes
- Warehousing: storage space, pallet handling, and inventory carrying cost
- Emergency reorder buffer: 10-15% additional inventory for line stoppages or demand spikes
- Relabeling labor: rework costs from supplier branding, incorrect label panels, or incompatible neck finishes
Skipping these line items does not reduce cost. It shifts the cost to operations, finance, or your distributor relationship.
Tools and Documents You Need Before You Source
Walking into a supplier conversation without the right documents can add two to three weeks of follow-up. Before outreach, prepare a bottle specification sheet. Include target fill volume, glass weight, neck finish, body dimensions, and case pack count. Add common formats such as 750 mL, 1 L, or 375 mL where relevant.
Define closure requirements with the same precision. Specify whether you need a cork-mouth neck for a T-top, a 28mm GPI finish for a screw cap, or a pilfer-proof tamper-evident cap. A mismatch here can stop the entire production run.
Confirm label dimensions before you commit to stock glass. Document the front panel, back panel, and neck label measurements. Then verify that the bottle works with your label equipment. Generic stock bottles are not always designed for standard label machinery. That issue becomes expensive after 10,000 units arrive.
Your warehouse and receiving teams should also weigh in early. Share case pack requirements, pallet footprint, maximum stack height, dock receiving hours, and forklift or racking limits. A supplier’s preferred configuration may look efficient on paper but fail in your facility.
Complete a compliance review before ordering. For distilleries, private-label programs, and bar well-bottle use, verify TTB labeling requirements, tamper-seal mandates, and state-level refill or repackaging rules. Regulatory issues can trigger distributor or retailer chargebacks that exceed the original bottle budget.
Decision Makers to Involve Before Ordering
Procurement rarely owns this decision alone. Bring the right stakeholders in before the RFQ to avoid redesigns, rejected deliveries, and production delays:
- Procurement / Purchasing – supplier qualification, MOQ negotiation, and lead times
- Operations / Production line manager – closure torque specs, filling line compatibility, and breakage tolerance
- Compliance / Legal – TTB approval, tamper-seal requirements, and private-label repackaging rules
- Brand / Marketing – bottle silhouette, label panel dimensions, and visual differentiation by spirit category
- Finance – total landed cost approval, duty drawback eligibility, and cash flow impact from long lead times
- Warehouse / Receiving – pallet configuration, dock requirements, and breakage claim process
- Sales / Channel leads – retail shelf dimensions and on-premise format requirements
Aligning these teams before you issue an RFQ can cut the sourcing cycle by two to four weeks. It also gives suppliers enough detail to quote the right bottle, not just the cheapest available SKU. That detail is especially valuable when comparing Glass Liquor Bottles across domestic stock, imported stock, and custom options.
Realistic Timeline: What to Plan For
Glass procurement timelines depend on the sourcing path: domestic stock, imported stock, or custom glass. Use the timeline below to set launch expectations before packaging, production, and sales teams lock their schedules.
Custom mold tooling adds $3,000-$15,000 to the budget and 8-12 weeks to the timeline. If your brand needs a proprietary bottle shape, start that process before the launch date is scheduled.
The Sample Testing Step Most Buyers Undervalue
A sample is more than a visual check. Use it to confirm that the bottle, closure, label, and filling process work together before you place the full order.
- Closure torque: Confirm that the selected cap or cork seats properly on the neck finish.
- Fill headspace: Verify that the bottle holds the labeled volume with correct ullage.
- Label adhesion: Test whether your label stock adheres cleanly, especially on embossed or textured surfaces.
- Thermal shock: Check risk for cold-filled spirits or variable-temperature warehouses.
- Pallet drop simulation: If your carrier’s breakage rate exceeds 1.5%, review bottle wall thickness or case pack cushioning.
Soda-lime glass, used in most liquor bottles, handles normal ambient conditions. Thin-wall bottles in cold-fill operations carry higher risk, so test them under the conditions they will face in production and storage.
Pro tip: Order samples before finalizing your closure vendor. A bottle and closure sourced from separate suppliers must be tested together, not only matched on a spec sheet.
Common Mistakes to Avoid
Selecting a bottle by unit price without running freight math. A heavier bottle priced $0.02 lower per unit can still cost $400 more per pallet in freight. Run the math at full pallet quantities.
Assuming stock bottle neck finishes are universal. They are not. A 28mm GPI finish and a 28mm continuous-thread finish look similar, but they can perform differently with specific closures.
Ordering at MOQ without a reorder buffer plan. If your production run depletes inventory and the supplier has a 10-week replenishment cycle, the line stops. Build a 10-15% safety stock position into the initial order.
Skipping compliance review for private-label or well-bottle programs. Refilling a brand-name bottle without proper TTB documentation is a federal violation. Generic glass with your own COLA-approved label is the correct path, and it requires lead time to execute legally.
Step 1 – Define the Use Case, Buyer Risk, and Compliance Requirements


Step 1 – Define the Use Case, Buyer Risk, and Compliance Requirements
You are not just buying Glass Liquor Bottles. You are buying regulatory exposure, shelf presence, and fill-line reliability. That risk starts before you place a single pallet order.
Define the use case before comparing shapes, pricing, or minimum order quantities. A bottle for a licensed distillery filling 750mL spirits at a bonded facility is one purchase. A bottle for a bar using generic well bottles, a co-packer applying a private label, or a gift retailer selling personalized empties is another.
What to Do
Start by identifying exactly how the bottle will be used. Answer these questions before requesting quotes:
- Who fills it – your team, a contract filler, bar staff, or the consumer?
- Where it is filled – a bonded facility, retail floor, customer’s home, or another location?
- What goes inside – spirits, non-alcoholic liquid, display filler, or nothing?
- Whether it enters commerce – sold retail, gifted, displayed, reused, or upcycled?
- Whether the label changes – original label remains, new label is applied, or no label is used?
- Whether the closure needs tamper evidence – often required for retail sale.
- Whether it carries another brand’s marks – embossing, etching, printing, or an original label.
If you cannot answer all seven questions, you are not ready to order.
Why It Matters
Each use case creates a different compliance path. Refilling a commercially sold branded bottle, even with the same liquid, can violate federal trademark and TTB regulations in the United States. Relabeling without proper COLA (Certificate of Label Approval) approval can expose co-packers and private-label buyers to fines and product seizure. State and provincial alcohol control rules add another layer. A practice allowed in one market may trigger a violation in another.
The quantified risk: TTB civil penalties for labeling violations can start at $1,000 per violation per day. At pallet quantities, non-compliance can erase the margin advantage of buying generic bottles.
How to Do It: Build a Use-Case Matrix
Map your situation before contacting suppliers. Use the matrix to connect buyer type, filling location, label status, sales channel, and compliance risk.
Glass Liquor Bottle Use Case vs. Compliance Risk
Common Mistakes to Avoid
- Assuming empty bottles can be refilled and resold. Resale requires the right licenses and approvals. If the bottle carries original brand marks, the issue is both regulatory and trademark-related.
- Relabeling branded bottles without rights. Removing or covering embossed logos does not clear the trademark risk. Use generic or custom-molded bottles for private-label programs.
- Treating display bottles and filled retail bottles the same. A display bottle with water and food coloring carries a different risk profile than a bottle filled with spirits and sold commercially.
- Ignoring local alcohol control rules. Federal TTB rules set the floor. State ABC boards can add requirements, including state-specific label registration after federal COLA approval.
Pro Tips
Get legal or compliance review before ordering pallets. This is especially important when bottles are generic, imported, reused, relabeled, or sold across multiple states. A one-hour review costs far less than a product recall or label re-run at volume.
For a multi-SKU private-label program, build the use-case matrix in a shared document. Get sign-off from your compliance contact and contract filler before locking in bottle specs. Closure type, neck finish, and fill-line tolerances all depend on end use. Those specs need to match the use case, not just the budget.
Time required: 2-4 hours to complete the matrix, gather answers from your filler and legal contact, and confirm state-specific rules before requesting quotes.
Step 2 – Choose the Right Glass Type, Color, and Bottle Shape
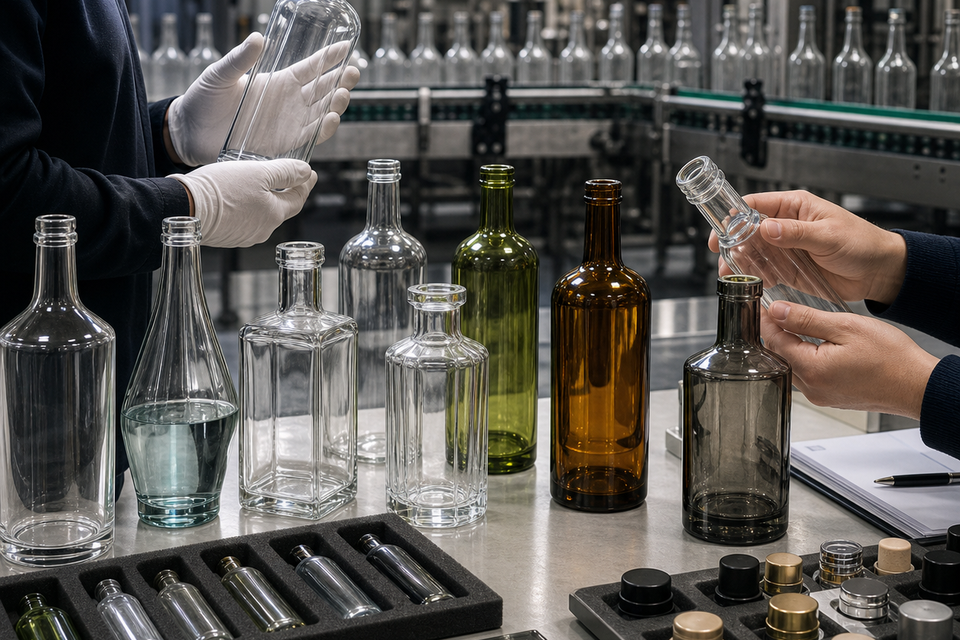
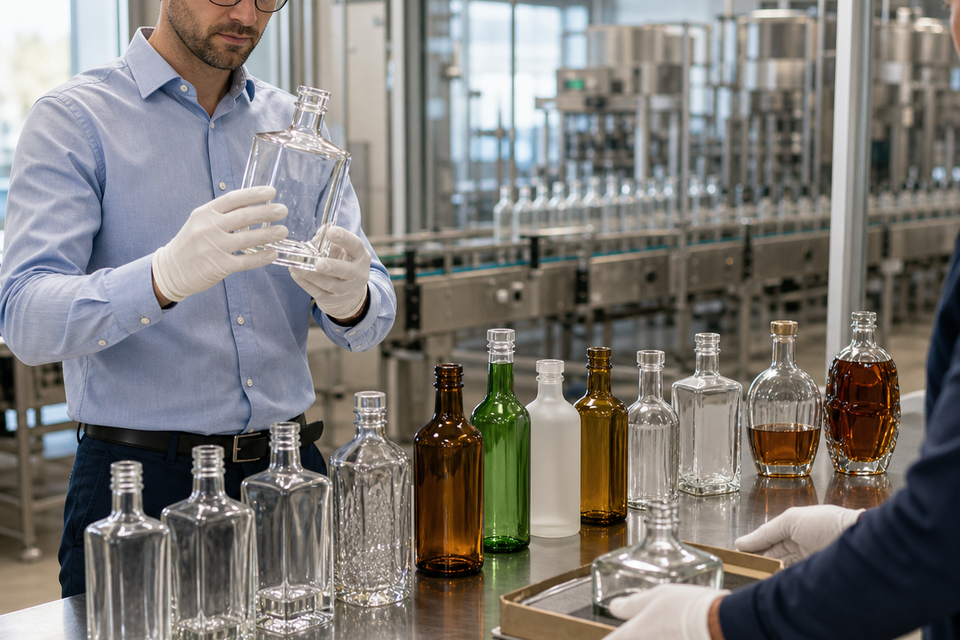
Step 2 – Choose the Right Glass Type, Color, and Bottle Shape
Your bottle choice affects every downstream decision: fill-line fit, freight cost, decoration options, closure performance, and shelf perception. Choose the wrong format, and you may need to reprint labels, absorb breakage claims, or source replacement bottles mid-run.
What You’re Deciding
At this stage, you are locking in four connected variables:
- Glass composition – soda-lime, flint, extra-flint, or borosilicate
- Color – flint, amber, green, cobalt, or custom
- Bottle profile – shape, height, shoulder style, and base geometry
- Weight and finish – wall thickness, neck diameter, and closure compatibility
Each choice affects the others. A heavy Bordeaux-style bottle in extra-flint glass may support a premium shelf presence, but it can add 80-120g per unit to pallet weight. Across full truckloads, that extra weight becomes a recurring freight cost.
Glass Composition: The Decision That Drives Everything Else
Most Glass Liquor Bottles use soda-lime glass because it is cost-effective, widely recyclable, and compatible with standard filling equipment. For most spirits, it is the practical default.
Flint glass offers higher clarity and stronger light transmission. It works well when liquid color or texture supports the brand story, such as craft gins, aged tequilas, or clear whiskeys displayed under shelf lighting.
Extra-flint glass pushes clarity further. Saver Glass and similar premium suppliers produce extra-flint bottles for prestige spirits. The tradeoff is higher unit cost and longer lead times: typically 16-22 weeks on imported stock versus 6-10 weeks for domestic soda-lime inventory.
Borosilicate has limited use in standard liquor packaging. It resists thermal shock and is common in laboratory or cookware applications. Unless your product faces extreme temperature cycling in the supply chain, borosilicate adds cost without adding practical value.
Comparison: Glass Types for Liquor Packaging
Color: Functional, Not Just Aesthetic
Color affects product protection, shelf presence, and decoration planning. Start with the liquid, then test how the glass color works with your label, closure, and retail environment.
Amber glass blocks UV light up to 99%, making it standard for whiskey, bourbon, and rum. Use it when light exposure creates a quality risk during warehouse storage or retail display.
Flint glass maximizes visual impact for vodkas, gins, and white rums where liquid clarity is part of the product appeal. The tradeoff is UV exposure, so storage and display conditions need tighter control.
Green and cobalt glass support category positioning. Green often fits European-style gins and liqueurs, while cobalt suits specialty or small-batch products. Both can limit decoration options because some label adhesives and ceramic inks behave differently on tinted glass. Confirm compatibility with your decorator before you commit.
Bottle Shape by Spirit Category
Use category norms as a starting point, then test the profile against your filling line, carton, and decoration plan. A bottle that looks strong in a rendering still needs to run cleanly through production.
Closure Compatibility: The Step Most Buyers Skip
The neck finish-the ring size and thread profile at the top of the bottle-must match your closure exactly. A 28mm bar-top cork will not fit a 30mm neck. Confirm the finish before you approve samples, order closures, or release a purchase order.
Standard finishes include:
- GPI/SPI screw threads – used with tamper-evident screw caps; standard for well spirits and high-volume production
- T-top corks – synthetic or natural press-fit closures; common in rum, flavored spirits, and gift sets
- Bar-top corks – wider-head closures used for craft and artisanal positioning
- Natural corks – closures that require consistent neck-inner-diameter tolerance; test compression fit across at least 50 units
Common mistake: Buyers order bottles and closures from separate suppliers without testing fit. A 0.2mm variance in inner neck diameter can cause cork failures at scale. Request a sample batch and test-fit your closure before placing a production order.
When to Request Samples – and What to Test
Request samples before any order over 500 units. A sample should prove that the bottle works across your closure, line equipment, decoration method, and shipping route.
Test for:
- Closure fit – press-fit or thread engagement across 10+ bottles from the same batch
- Fill-line compatibility – reliable feeding through your filler, capper, and labeler
- Label adhesion – a 72-hour ambient and refrigeration cycle to check for peeling or bubbling
- Drop resistance – for e-commerce fulfillment, a filled-bottle drop from 1.2m onto concrete
- Weight and glass distribution – visible thin spots, supplier base-thickness data, and drop-test certification
Sample lead time from domestic suppliers is typically 3-7 business days. Offshore samples from China, Mexico, or Europe can take 3-6 weeks minimum. Build that timing into your sourcing calendar before you request production quotes.
The Procurement Planning Model: Domestic vs. Imported Glass
Generic wholesale listings rarely show the operating tradeoffs behind Glass Liquor Bottles. Use the table below to compare suppliers before you request quotes.
The practical tradeoff: importing can save 20-40% per unit at 10,000+ quantities, but it ties up capital in inventory and extends your reorder cycle by 4-6 months. For a startup distillery launching under 2,000 bottles per run, domestic stock glass usually wins on total landed cost once storage and cash flow are factored in.
Common Mistakes to Avoid
- Choosing by aesthetics alone. A 700g bottle signals luxury, but it adds roughly 200kg per pallet over a 450g equivalent. That weight affects freight cost on every shipment.
- Specifying borosilicate without a thermal use case. You pay 3-4x more for a property your bottle may never need.
- Skipping closure testing. Order 50 closures with your sample bottles and test the fit before signing a PO.
- Ignoring fill-line specs. Some tall, narrow bottles feed poorly through rotary fillers. Check bottle height-to-diameter ratio against your filler’s mechanical limits.
- Missing decoration compatibility. Ceramic inks, UV coatings, and shrink sleeves perform differently across glass colors and surface textures. Get written confirmation from your decorator before locking in a bottle.
Pro tip: Ask every supplier for four data points before ordering: bottle weight in grams, base thickness in millimeters, drop-test certification standard, and glass distribution inspection method. Suppliers that cannot answer quickly may be poor fits for production-scale procurement.
Step 3 – Specify Capacity, Neck Finish, Closure, and Tamper-Evident System

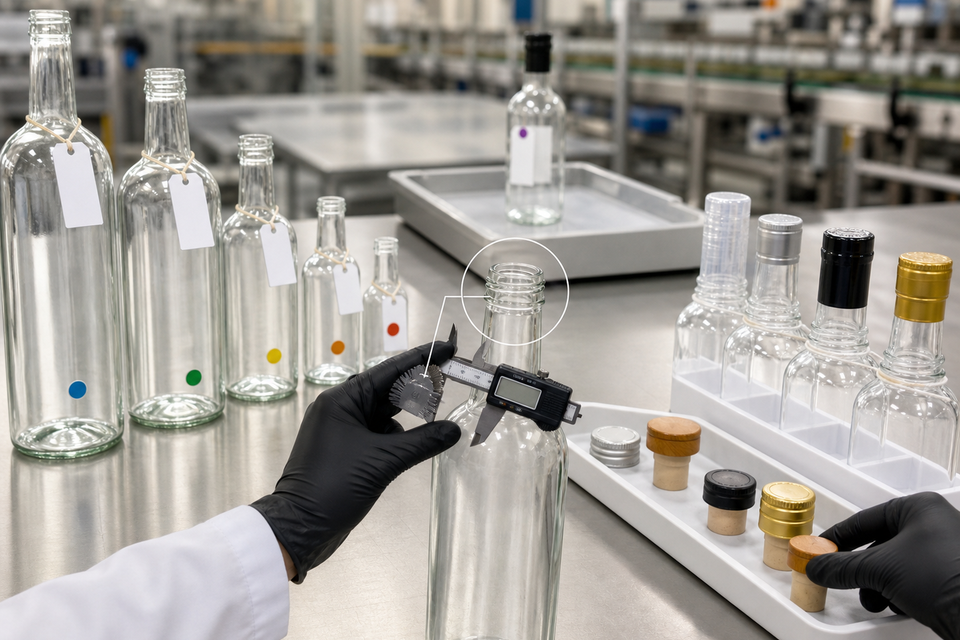
Step 3 – Specify Capacity, Neck Finish, Closure, and Tamper-Evident System
A bottle spec can look complete on paper and still fail at the filler, behind the bar, or on the retailer’s shelf. For Glass Liquor Bottles, four fields cause most downstream fit issues: nominal capacity, neck finish, closure type, and tamper-evident system. Confirm these details before you approve a sample or issue a purchase order.
What You’re Specifying
Your technical spec should cover every dimension that connects with another component. Start with the bottle’s nominal and overflow capacity, such as 750 mL nominal / 780 mL overflow. Then define the neck finish, including diameter, thread profile, or cork bore. Common examples include BVS 30×60, ROPP 28, and #9 cork bore.
Next, specify the closure type and tamper-evident system. Options may include natural cork, synthetic cork, T-top bar cork, bar-top wood or ceramic, screw cap, tear-tab capsule, shrink sleeve, or a combined capsule-and-cork assembly. Also confirm bar pour spout compatibility, especially for hospitality accounts.
Your spec should also include label panel dimensions, such as flat panel height, curvature, and surface treatment for adhesion. Finally, document the case pack and pallet configuration, since both affect freight cost and breakage risk.
If possible, request an annotated bottle drawing. It should label the neck finish, bead, shoulder, label panel, punt, base diameter, total height, fill point, and closure fit.
Why One Missing Field Can Break the Line
Most procurement failures start with a fit problem, not a bad bottle. The bottle may look right, yet fail with the buyer’s closures, filler, labeler, bar pourers, or sealing equipment.
A #9 cork that fits one supplier’s flint bottle may sit loose in a heavier decanter with a wider bore. A variance of 0.3 mm can cause leakers at the filler. Likewise, a screw-cap bottle specced for an ROPP 28 finish will require a new sealing head for a standard BVS 30 capsule. These issues commonly push launches back four to six weeks after samples are approved.
Case Study: Decanter vs. Standard Flint – A Real Tradeoff
A craft whiskey brand was choosing between a premium decanter bottle and a standard flint bourbon bottle. The decanter weighed 680g, with a deep punt and embossed shoulders. The standard flint option weighed 420g, with a shallow punt and flat label panel. The decanter tested better in consumer focus groups, but the full cost model changed the decision.
The decanter’s total landed cost was $4.60 more per case before custom cork sourcing. At 500 cases per month, that added $2,300 in monthly packaging overhead before breakage claims.
The brand chose the standard flint bottle, then upgraded the system around it. A premium wax dip closure and heavy paper label with foil hot-stamp improved shelf presence. Landed cost stayed inside margin, and the wax dip served as the tamper-evident system. That also removed the need for a separate capsule vendor.
The principle: premium perception comes from the full packaging system, not bottle shape alone. Closure, decoration, and label stock can carry the brand at a fraction of the bottle cost delta.
How to Build Your Spec
- Request supplier technical drawings in PDF or DWG format. Confirm the neck finish code, bore diameter, bead detail, and thread type against your closure vendor’s tolerance sheet.
- Cross-check the spec against your filling line. Most commercial fillers accept BVS 30 and ROPP 28 without a head change. Unusual finishes require a tooling order, which adds two to four weeks and $800-$2,000.
- Send the spec to your closure vendor before issuing a purchase order. Cork suppliers, capsule houses, and screw-cap manufacturers can flag fit issues early.
- Order closures and bottles together for sample testing. Include capsules when possible. Run at least 50 filled units through your capper and inspector before approving production.
- Confirm label fit and case pack before final approval. Check label artwork against panel curvature and adhesion requirements. Then review the carton layout with your carton supplier. A 12-pack decanter carton may require custom partitions that cost $0.35-$0.60 more per case than a standard insert.
Common Mistakes
- Assuming all corks fit all bottles. Cork bore varies by 0.5-1.5 mm across bottle suppliers. Confirm the bore spec in writing.
- Switching closure suppliers between sampling and production. A cork that passed on a sample batch may not match the production cork’s diameter if you change vendors.
- Forgetting bar pour spout diameter. On-premise accounts use standard pourers sized for a #9 or #10 bore. A non-standard neck can block a major hospitality channel.
- Ordering bottles before finalizing label artwork. Label panel curvature affects adhesion and print registration. Finalize artwork dimensions before approving bottle geometry.
Pro tip: A low-cost bottle becomes expensive when it requires a custom cork, non-standard sealing head, or specialty capsule. Price the full closure system – bottle, cork, capsule, and sealing tooling – before comparing bottle quotes.
Step 4 – Calculate Total Landed Cost, MOQ, Lead Time, and Freight Risk


Step 4 – Calculate Total Landed Cost, MOQ, Lead Time, and Freight Risk
Your unit price quote is not your real cost. By the time imported Glass Liquor Bottles reach your facility, the invoice may include ocean freight, port demurrage, customs duty, inland trucking, breakage allowance, warehousing, and emergency air freight for short orders. None of those costs appear on an ex-works price sheet. Build the full landed cost picture before you commit to a supplier, volume tier, or delivery timeline.
What You’re Calculating
At this stage, reduce every supplier quote to one comparable number: cost per usable bottle delivered to your facility.
That calculation requires inputs across eight categories:
- Unit cost – ex-works, FOB, or DDP, depending on quote terms
- MOQ and pallet quantity – minimum order commitment and bottles per pallet
- Ocean or ground freight – full container load versus less-than-container load; LCL carries a cost premium and greater transit variability
- Import duty and customs clearance – typically 2-7% for glass packaging under HTS codes; verify against your tariff schedule
- Damage allowance – domestic shipments typically run 0.5-1%; international LCL shipments can run 2-3%
- Warehousing and handling – receiving labor, storage days, and pallet turn rate
- Working capital cost – cash tied up during lead time, especially for 90-120 day import cycles
- Reorder timing buffer – weeks of inventory needed before a replenishment order must ship
The gap between quote price and delivered cost can change the supplier decision. A bottle quoted at $0.85 ex-works from an overseas supplier may land at $1.40 or more after freight, duty, damage, and storage. A domestic stock bottle at $1.10 delivered to your door may cost less in practice. It also arrives in 5 days, not 90.
How to Build the Comparison
Request quotes from at least three suppliers using identical specs: volume, neck finish, glass weight, color, and closure type. Ask for pricing at two or three volume tiers so you can see where MOQ breaks occur.
Normalize every quote using this structure:
Fill every cell before you compare options. If a supplier cannot provide pallet dimensions, case weight, or freight terms, the quote is incomplete. Treat it as a placeholder, not a decision-ready number.
Lead Time and Freight Risk
Lead time is more than a delivery estimate. It affects cash flow, inventory planning, and production risk.
Domestic stock bottles typically ship in 3-7 business days. Domestic custom bottles from a mold run usually require 8-14 weeks for the first production run. Imported stock often takes 30-60 days by sea. Imported custom bottles with a new mold can take 16-24 weeks, including mold fabrication, sample approval, and production.
Ask every supplier for their 12-month on-time delivery rate. A supplier that quotes 45-day lead times but meets that window only 60% of the time creates inventory risk. That risk becomes more expensive when your fill line, label run, or retail launch has a fixed date.
Buyers often underestimate three freight risks:
- LCL consolidation delays. Your shipment waits for the container to fill, which can move transit windows by 2-4 weeks.
- Port congestion surcharges. These charges appear after booking and are non-negotiable once your cargo is in transit.
- Pallet density mismatch. Tall, narrow bottles ship at lower density than squat, wide formats. A pallet that fits 600 standard 750 mL bottles may hold only 420 tall bordeaux-style bottles, raising freight cost per unit by about 30%.
Common Mistakes to Avoid
Comparing quotes without aligning freight terms. Ex-works, FOB origin, CIF, and DDP quotes are not directly comparable. Convert every quote to DDP or cost per bottle delivered before evaluation.
Ignoring pallet quantity constraints. Orders below a full pallet usually move by LTL freight per hundredweight, not per pallet. That can double the per-unit freight cost.
Buying at your minimum. If your reorder point is 5,000 units and lead time is 60 days, ordering 5,000 units at consumption of 800 per week leaves no buffer. Use a reorder formula: weekly consumption x lead time in weeks + safety stock weeks.
Assuming supplier inventory will hold. A supplier with 20,000 units in stock can sell through that inventory while you deliberate. Request written inventory holds with expiration dates, or plan for availability to change.
Pro tip:
- Ask about mold ownership terms. If you commission a custom mold, confirm who owns it, what happens if the supplier discontinues the run, and whether you can transfer production to another facility.
- Request historical lead time data. Ask for actual ship dates versus committed dates, not a promise. Strong suppliers can provide a simple delivery record.
- Confirm pallet dimensions and case weight. These inputs determine freight class, pallet density, and total transportation cost.
- Confirm the replacement policy for transit damage. Ask whether credit is issued per broken unit or per case, and verify the claims submission window.
- Ask if the supplier can reserve inventory against a forecast. Some suppliers will hold stock for 30-90 days against a signed purchase commitment, reducing the need for emergency air freight.
The Emerging Revenue Layer: Personalization, Refill Programs, and In-Store Reuse
Procurement teams focused only on unit cost can miss a larger shift. The next growth channel for Glass Liquor Bottles is not packaging alone. It is in-store personalization, refill programs, and reuse campaigns that create revenue per customer interaction, not just per unit sold.
That shift changes your sourcing calculator in practical ways. Bottles selected for personalization, refill, or reuse need to meet requirements beyond price, MOQ, and lead time. Build those requirements into the comparison before you approve a supplier.
Laser engraving and screen printing. Bottles intended for laser engraving or ceramic screen printing need glass composition and surface smoothness ratings from the supplier. Flint and extra-flint soda-lime glass engrave cleanly. Some recycled-content glass contains surface impurities that can create inconsistent engraving. Confirm compatibility with your decorator before ordering at scale.
Refill and reuse programs. Retailers and distillery tasting rooms running refill programs must address two compliance boundaries. First, bottle sanitization standards require commercial glass washing to 180°F with NSF-certified detergent as the accepted food-safe threshold. Second, tamper-evident seal requirements apply once a refilled bottle leaves a licensed facility. At that point, the bottle must carry a compliant closure under TTB and state-level ABC regulations. Generic bar-top corks do not satisfy most tamper-evident requirements for retail sale.
Sustainability claims and liability. “Reusable,” “refillable,” and “recycled glass” are not interchangeable claims. Each carries a different evidence standard under FTC Green Guides and, increasingly, state-level environmental marketing rules. Hospitality groups and private-label programs should obtain written substantiation from suppliers before printing sustainability language on bottles or point-of-sale materials.
The practical boundary. Bars and restaurants can refill bottles for on-premise consumption within their licensed premises under most state ABC frameworks. Once a refilled bottle is sold or transferred off-premise, TTB labeling, tamper seals, and state licensing requirements apply. Define that boundary before you build a refill program.
Add these requirements to your sourcing calculator. Flag which bottles support decoration, refill infrastructure, and sustainability certification alongside cost, MOQ, lead time, and freight risk.
Time required for this step: 3-5 hours to collect three normalized quotes, build the Wholesale Glass Liquor Bottle Sourcing Calculator, and confirm lead time reliability data. The output is a sourcing decision document your team can revisit at every reorder cycle.
Step 5 – Order Samples and Test Bottles Before Committing to Production

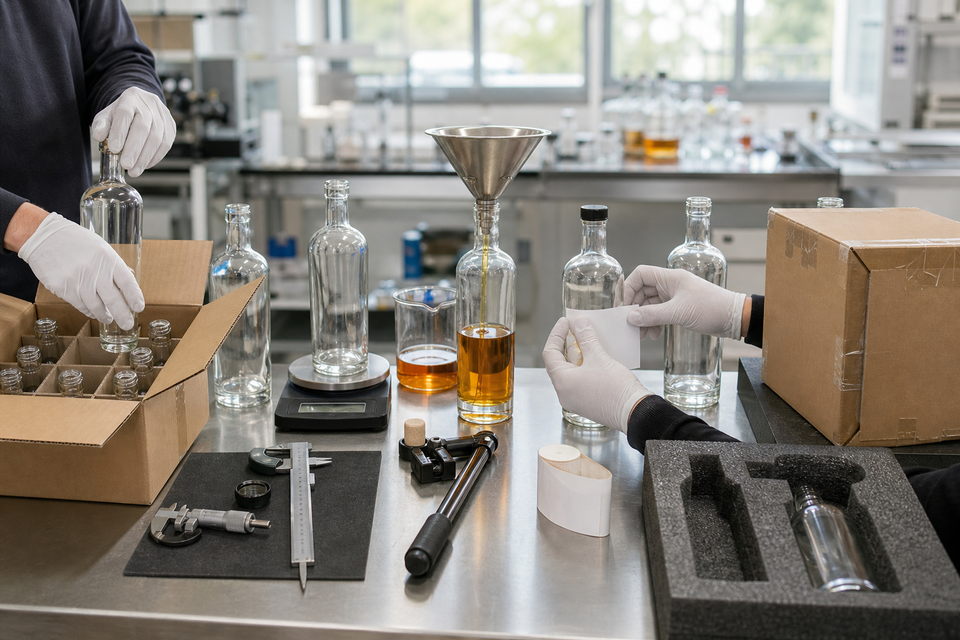
Step 5 – Order Samples and Test Bottles Before Committing to Production
Before you issue a purchase order, run structured sample tests on your Glass Liquor Bottles. One polished showroom sample says little about production performance. You need to confirm how the bottle runs on your filling line, fits your closure, holds your label, and survives case packing.
This is the point where small unchecked issues become expensive procurement problems.
What to Do
Order at least 3-5 samples per shortlisted supplier. If possible, request bottles from the same production batch rather than pre-selected showroom pieces. For decorated bottles, including screen printing, laser engraving, and applied color labels, order at least two decorated samples. You are testing both bottle quality and unit-to-unit consistency.
Run each sample through this workflow:
- Visual inspection – Check for seeds, stones, chips, cracks, bubbles, and surface scuffs under direct light. Roll the bottle on a flat surface to check for wobble.
- Dimensional verification – Measure neck finish diameter, height, and wall thickness against your spec sheet. A 0.3 mm neck variation can compromise closure seal integrity.
- Closure fit test – Apply your actual cork, T-top, bar top, or tamper-evident screw cap. Avoid substitute closures. Torque test screw caps and check cork compression fit.
- Label and decoration test – Apply your printed label at room temperature. Check for wrinkling, edge lift, and panel distortion. For laser-engraved or screen-printed bottles, assess contrast, edge sharpness, and ink adhesion with a scratch test.
- Fill-line simulation – Run samples through your actual filler or simulate the feed manually. Flag jamming, tipping, and neck-finish interference.
- Drop and leak test – Fill samples to nominal volume, seal them with your closure, invert them for 60 seconds, and check for seepage. Drop-test case-packed units from pallet height to assess breakage risk.
- Carton and case inspection – Check divider fit, stack height, and whether bottles shift inside the case during transit simulation.
Why This Step Protects Your Budget
Structured sample testing catches problems catalog photos cannot show: wobble, glass defects, closure leakage, label wrinkling, scuffing, fill-line jams, weak engraving contrast, and carton damage. Each issue costs less to fix before production than after filled inventory enters your supply chain.
A misaligned neck finish discovered after 10,000 units ship can cost 10x more to resolve than the same issue caught during a five-bottle sample test. Decoration failures are also expensive. Screen-printed bottles rejected after filling often require manual removal or full write-off. Laser engraving is permanent, so approve contrast, placement, and depth before production begins.
The Trend Shift That Changes What You Test
Sampling used to focus mainly on packaging integrity. Now it also needs to account for revenue-generating bottle experiences, including in-store personalization, refill programs, and branded reuse campaigns. The next growth channel for Glass Liquor Bottles is not just packaging. It is how the bottle supports customer experience after the first fill.
That shift is already visible in hospitality and retail. Distilleries and spirits retailers use laser engraving for on-demand gifting, custom event bottles, and loyalty rewards. Bars and restaurant groups run refill programs with branded house bottles for spirits by the glass. Each use case adds compliance and safety variables that standard sample testing can miss.
- Laser engraving removes surface glass and changes the bottle’s stress profile. Test engraved bottles for structural integrity, not just appearance. Deep engravings near the shoulder or heel carry higher risk than mid-body placement.
- Screen printing involves heat-cured inks. Confirm food-contact compliance certifications from the supplier before approving any decoration near fill-line contact zones.
- Refill programs require bottle sanitization compatibility. Test whether the bottle tolerates commercial-grade sanitization cycles, typically caustic wash at 60-80°C, without label delamination, decoration fade, or glass stress.
- Tamper-evident seals create added retailer liability for refillable or reusable bottles. In most jurisdictions, removing and replacing a tamper seal on a commercially filled bottle without TTB or equivalent authority approval creates a compliance violation. Your sample approval process should flag this boundary.
- Sustainability claims such as “reusable,” “refillable,” and “recycled glass” need supplier-level support. Ask for documentation, including recycled content percentage, returnable program certifications, or EPD data. Unsupported claims can expose hospitality groups and distilleries to greenwashing liability.
Common Mistakes to Avoid
- Approving on one sample. A single attractive bottle cannot represent production variation. Batch-to-batch glass color, dimensional drift, and decoration consistency only appear across multiple units.
- Testing with a substitute closure. Your cork source, cap supplier, and bottle manufacturer all work within tolerances. The valid test is your actual closure on your actual bottle.
- Assuming prototype quality equals production quality. Pre-production samples may be hand-finished or cherry-picked. Request written dimensional tolerances and AQL inspection standards before sign-off.
- Skipping carton testing. A bottle can pass every individual test and still arrive damaged if case dividers are undersized or pallet stack height exceeds the carton’s compression rating.
Pro Tips
Keep a “golden sample” on file. Once you approve a bottle, seal two or three signed samples in a labeled bag with the purchase order number and date. These become your reference standard for quality disputes, reorder comparisons, and supplier audits. Without them, “this doesn’t match what we approved” is an opinion, not evidence.
Build a one-page sample checklist. Include pass/fail fields for visual inspection, dimensional verification, closure fit, label adhesion, fill-line trial, drop test, engraving test, carton fit, and final sign-off with approver name and date. Share it with every supplier before samples ship. This removes ambiguity about what you are evaluating and signals that you are a serious buyer.
Use a screenshot or template. Show the checklist format your team will use to approve or reject samples. Include fields for visual inspection, dimensions, closure fit, label fit, fill-line trial, drop test, engraving test, carton fit, and final sign-off. A shared template gives internal teams and suppliers the same approval standard.
Time this step correctly. Budget 2-3 weeks for domestic suppliers and 4-6 weeks for overseas suppliers. Factor in shipping, internal review, and possible re-sample cycles if the first batch fails. Rushing sample approval to hit a launch date turns preventable production errors into your cost.
Step 6 – Plan Decoration, Labeling, Engraving, and Retail Personalization
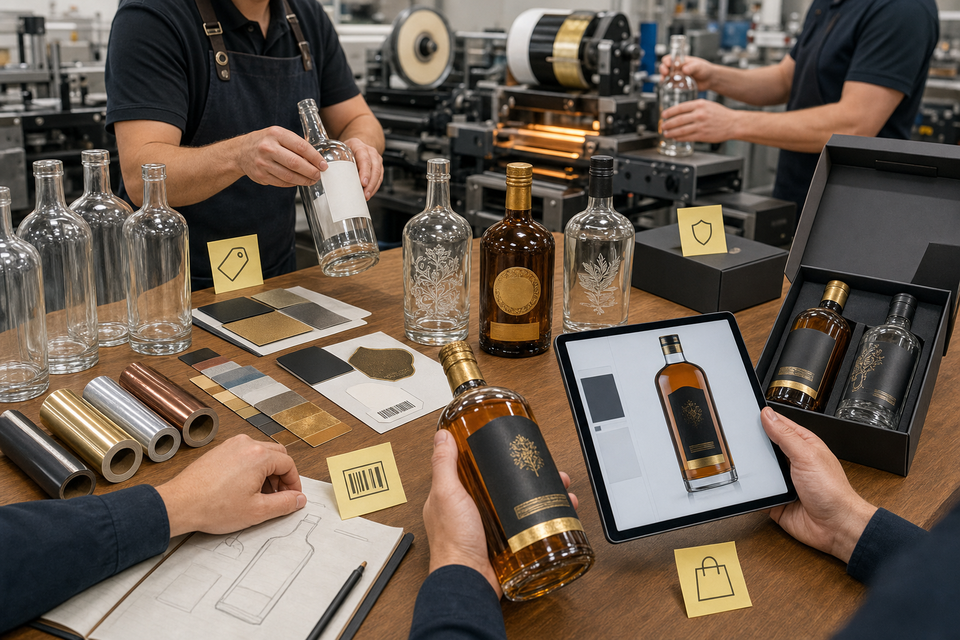
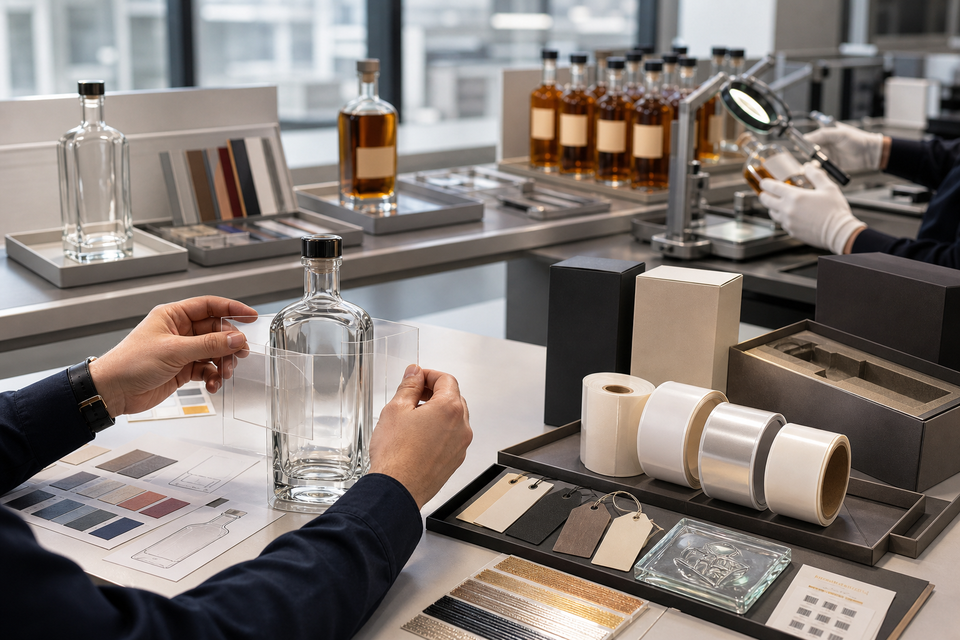
Step 6 – Plan Decoration, Labeling, Engraving, and Retail Personalization
Your decoration and personalization choices affect brand equity, compliance risk, and revenue potential at the same time. Plan them early, and the bottle becomes a commercial asset. Delay them, and you absorb reprints, regulatory flags, scrap, and production delays.
What You’re Deciding
For Glass Liquor Bottles, decoration works across four layers. Each layer affects shelf presence, line performance, and post-purchase value:
- Primary identification: pressure-sensitive labels, wet-glue labels, ceramic or screen-printed applied color labels (ACL), or embossed glass
- Premium decoration: laser engraving, acid etching, shrink sleeves, neck foils, or wax dipping
- Retail or hospitality personalization: in-store engraving, custom neck tags, or on-demand label printing
- Compliance labeling: mandatory TTB-required content, including brand name, class, alcohol content, net contents, and government warning
Your chosen method drives equipment needs, production speed, unit cost, scrap rate, and personalization margins. It also determines where customization happens: before filling, after filling, or at retail.
Why This Step Matters More Than Most Buyers Expect
Decoration affects three business outcomes at once: brand perception on shelf, regulatory compliance on the label, and fill-line throughput in production. A premium bottle can still fail commercially. Labels may wrinkle, required text may become unreadable, or personalization may slow the retail counter.
Pressure-sensitive labels offer the most flexibility. They work on most bottle shapes, support short runs of 500-2,000 units, and change easily between SKUs. Curved or tapered bottles increase air-pocket risk. Without the right label stock and equipment calibration, rejection rates can rise by 10-20%.
Screen-printed ACL decoration removes label-application labor. It also holds up against ice buckets, condensation, and bar handling. That durability makes it attractive for premium spirits and hospitality use. The tradeoff is commitment. Minimum orders usually start at 5,000-10,000 units, and design changes require another production run.
Laser engraving belongs in a different category. It creates a tactile premium finish that supports gifting, hospitality, and retail personalization revenue. Treat it as a post-fill or point-of-sale process, not a standard production-line decoration method.
Decision Tree: Best Decoration Method for Glass Liquor Bottles by Volume and Use Case
How to Execute Each Method
Pressure-sensitive labels: Specify label stock before quoting. Use BOPP film for ice-bath resistance and paper for standard shelf display. Confirm adhesive type, such as permanent or removable for refill programs. Lock roll direction early. Budget $0.04-$0.18 per label at commercial volumes.
ACL / screen printing: Supply camera-ready artwork in vector format. Before proofing, confirm glass surface flatness and shoulder angle with the printer. Irregular curves may require custom tooling. Lead time typically runs 8-14 weeks from artwork approval.
Laser engraving: Treat engraving as both a revenue opportunity and a safety process. Before offering it to customers, confirm that the bottle, coating, equipment, and retail workflow can deliver repeatable results.
- Test glass compatibility – coated or painted glass can chip, flake, or produce toxic fumes during engraving. Bare flint or frosted glass performs most predictably.
- Confirm heat impact – filled bottles require ventilation. Avoid engraving directly over the fill line without a heat dissipation gap.
- Validate contrast – clear flint glass produces subtle engraving. Frosted or color-coated surfaces show higher contrast but need adhesion testing first.
- Check ventilation and enclosure requirements – commercial laser engravers produce fine glass particulate. A Class 1 enclosed laser with proper extraction is non-negotiable for operator safety.
- Calculate throughput honestly – a mid-range CO₂ laser engraves one standard 750mL bottle in 90-180 seconds, depending on design complexity. At a retail station, that limits throughput to 20-40 bottles per hour.
Shrink sleeves: Full-body sleeves maximize shelf impact but require a steam or heat tunnel. They also need bottle geometry that supports even sleeve application. Sleeves can hide tactile glass features, so flag that tradeoff when bottle shape is part of the brand story.
The Next Revenue Channel: In-Store Personalization, Refill Programs, and Reuse
The next growth channel for glass liquor bottles is not just packaging. It is the customer experience built around the bottle after purchase. Retailers, hospitality groups, and distilleries use personalization and reuse programs to extend margin beyond the first sale.
1. In-store engraving stations: Retailers offering personalized engraving on gift bottles charge a $15-$40 premium per bottle. In many cases, that premium exceeds the margin on the spirit itself. Entry-level enclosed laser engravers cost $3,000-$8,000. At 5-10 engravings per day, payback periods run 60-120 days in high-traffic retail environments.
2. Refill and reuse programs: Distillery taprooms and specialty retailers are introducing refillable bottle programs tied to house brands. These programs require bottles designed with thick walls for reuse cycles. They also need a documented sanitization protocol, such as a commercial glass washer at 82°C minimum or a caustic soda rinse at approved concentrations. Tamper-evident closures must be reapplied after each refill.
3. Sustainability labeling and claims: “Reusable,” “refillable,” and “recycled glass content” claims can support the retail pitch. Each claim carries liability boundaries. In the US, the FTC Green Guides govern environmental marketing claims. A “reusable” claim requires that the bottle be practically reusable by a significant portion of consumers. It cannot be merely possible in theory.
Compliance Boundaries You Cannot Skip
Decoration never overrides mandatory label requirements. TTB-regulated bottles must display:
- Brand name
- Class and type designation
- Alcohol content (% ABW or ABV)
- Net contents
- Name and address of bottler or importer
- Government health warning statement
Decorative elements cannot cover these fields, even partially. If you use shrink sleeves or wraparound screen printing, build a clear compliance panel into the design spec before production begins. Required information must remain readable after decoration, handling, and display.
Tamper-evident seals add another layer. For refillable or retail-personalized bottles, the original tamper-evident closure is broken at point of sale. Retailers and hospitality operators reapplying a closure need a seal that clearly separates the retailer-applied reseal from the original factory seal. Clear visual separation helps reduce liability exposure under state alcohol regulations.
Common Mistakes to Avoid
- Engraving coated or painted glass without testing – surface coatings can chip, create toxic byproducts, or produce inconsistent contrast. Test before any customer-facing rollout.
- Placing mandatory label content on curved panels without verification – TTB field examiners flag required text that is distorted, partially obscured, or hard to read without rotating the bottle.
- Underestimating label application labor on tapered bottles – a tapered or heavily curved bottle can double label application time per unit compared to a straight-sided cylinder.
- Launching refill programs without a written sanitization protocol – without documentation, contamination liability shifts to the operator. Even a simple written procedure is essential.
Pro tip:
- For laser engraving, run a 20-unit test batch across your exact bottle SKU, including filled and empty bottles. Test chipping, fume production, contrast, heat impact, ventilation, safety enclosure, throughput, and operator training.
- For ACL decoration, request a physical color drawdown on your actual glass substrate. Screen colors shift between digital proof and fired ceramic ink, and that shift is permanent.
- For pressure-sensitive labels on tapered bottles, ask your label converter for wrap angle calculations before ordering. A label engineered for a straight cylinder can fail on a significant taper.
- For refill programs, involve your state alcohol regulatory authority before launch. Refill rules vary by state and can affect your license.
Time and effort estimate: Decoration decisions add 2-4 weeks to a first-run launch timeline when sampling, artwork proofing, and compliance review run together. Programs involving laser engraving or refill infrastructure need another 4-8 weeks for equipment sourcing, operator training, and protocol documentation before the first customer interaction.
Step 7 – Address Real-World Glass Liquor Bottle Challenges and Solutions

Step 7 – Address Real-World Glass Liquor Bottle Challenges and Solutions
The true cost of Glass Liquor Bottles rarely appears on the purchase order. It shows up later through returned shipments, regulatory warnings, brand dilution, and customer complaints. Buyers are measured less on unit price than on whether the packaging keeps production moving, protects brand equity, satisfies regulators, and prevents avoidable field issues.
Before your first shipment lands, build a risk register. Map every issue that could interrupt production, damage the brand, or create compliance exposure. Use these columns: problem, likely cause, operational impact, owner, prevention method, and corrective action. Review the register before issuing the PO. Revisit it after the first shipment clears receiving, when defects, handling issues, and documentation gaps become visible.
The Eight Problems Worth Tracking
The Trend That Changes the Risk Equation
The next growth channel for Glass Liquor Bottles is not limited to packaging. In-store personalization, refill programs, and reuse campaigns are turning bottles into revenue-generating customer experiences for retailers, distilleries, and hospitality groups. That growth also introduces liability categories many buyers have not built into their sourcing process.
Three formats are driving this shift:
-
Laser engraving and screen printing. Both work on flint and extra-flint glass. Laser engraving is permanent and survives washing cycles, which matters for reuse programs. Screen printing requires oven curing and can crack on thin-walled bottles below 3mm. Confirm your glass wall spec before committing to either method.
-
Refill programs and bottle sanitization. A bar or distillery running a refill campaign needs a validated sanitization protocol. That usually means using a commercial sanitizer at the correct concentration, contact time, and rinse cycle. Verbal supplier assurances will not protect you if a sanitation failure triggers a health complaint. Get the written SOP and test it against the applicable food-contact standards in your jurisdiction.
-
Tamper-evident seals on reused bottles. Regulatory bodies in most U.S. states and the EU treat a broken or missing tamper seal as an indicator of adulteration. If you reuse bottles for a refill or personalization program, apply new tamper-evident closures to every filled unit. Reusing the original closure, even on a clean bottle, creates a safety and compliance gap.
Closure Compatibility: The Underexplained Failure Point
Buyers often assume the closure decision is settled at Step 3. In practice, it resurfaces during personalization programs, refill campaigns, and spirit-specific packaging changes.
Cork and T-top closures work well for whiskey, rum, and cognac positioning. They are less reliable in refill contexts because repeated removal and re-insertion compresses the cork, weakens the seal, and increases leakage risk. Bar-top and screw-cap closures tolerate higher reuse cycles, but they can look mismatched on premium spirits bottles. Tamper-evident caps are the correct choice for any refill or reuse program where product leaves the controlled environment of your fill floor.
How to Defect-Track Across Your Supply Chain
Track defects beyond the SKU level. Capture them by batch, supplier, shipping lane, bottle type, and carrier. A 2% breakage rate may look manageable in aggregate, but it could hide a 12% rate on one supplier’s 750mL flint bottles moving by LTL across two freight transfers.
That level of detail points you to the right fix. A batch pattern may require a manufacturing conversation. A lane pattern may call for a packaging change or carrier switch. A warehouse pattern may point to storage orientation, stacking, or temperature exposure.
Pro tip: Photograph every damaged pallet at receiving before signing the BOL. That documentation gives you leverage for carrier claims and supplier debit memos. Without it, you absorb the cost.
Common Mistakes to Avoid
- Relying on verbal supplier assurances for sanitation, glass composition, or sustainability claims. Get the certificate, spec sheet, or third-party audit. If the supplier cannot provide it, treat that as the answer.
- Launching a reuse campaign without legal review of brand rights, sanitation protocol, and tamper-seal requirements. A failed health inspection or TTB inquiry can cost more than the campaign generated.
- Making sustainability claims without substantiation. “Recycled glass” requires documented recycled content percentages and chain-of-custody records. The FTC Green Guides apply, and unsupported claims create regulatory and reputational risk.
- Sampling only for aesthetics. Test closure torque, fill compatibility, and label adhesion on actual production equipment. A bottle that photographs well but leaks under fill-line pressure fails on the measure that matters.
Effort and Timeline
A buyer with the supplier spec sheet and fill-line data can build the risk register in two to four hours. Updating it after the first shipment takes about thirty minutes. That investment helps prevent chargebacks, regulatory delays, and returns that cost ten to twenty times more to resolve after the product reaches the market.
Step 8 – Place the Purchase Order, Manage Logistics, and Inspect Incoming Shipments


Step 8 – Place the Purchase Order, Manage Logistics, and Inspect Incoming Shipments
Convert your approved spec and quote into a controlled purchase order before a single pallet ships. The PO is your legal and operational anchor. It gives the supplier one source of truth for the bottle, closure, decoration, quantity, freight terms, and defect standards. Without it, a supplier may ship the wrong revision, apply the wrong decoration, or short the order. You also lose a clear basis for dispute resolution, replacement, or chargeback.
What You’re Doing at This Stage
At this stage, you translate everything approved in Steps 1-7 into a binding commercial document. That includes glass type, neck finish, closure, decoration spec, MOQ, lead time, freight terms, and receiving requirements. Once the PO is acknowledged, you manage shipping, warehouse receipt, incoming inspection, storage, and supplier communication.
Time and effort: Allow 1-2 days to build and issue the PO correctly, 1-2 business days for supplier acknowledgment, and 30-60 minutes per pallet for receiving inspection, depending on shipment volume.
Build the Purchase Order Correctly
A complete Glass Liquor Bottles PO has three layers: commercial, technical, and logistics. Each layer protects a different part of the transaction. Commercial fields define price and ownership. Technical fields control what the supplier must produce. Logistics fields protect the shipment once bottles leave the factory.
Commercial fields:
- Supplier name, address, and contact
- Your PO number, issue date, and currency
- Unit price, quantity, and total value
- Payment terms and Incoterms, such as FOB origin or CIF destination
Technical fields:
- SKU and bottle description, including shape, color, and capacity
- Drawing revision number and version date
- Neck finish designation and closure specification
- Decoration method, such as screen print or laser engraving
- Color codes and artwork revision
- Tamper-evident seal type and placement requirement
- Acceptable quality level (AQL), typically AQL 1.5 or 2.5 for glass packaging
- Replacement policy for defects above the agreed threshold
Logistics fields:
- Case pack count, pallet configuration, and tier/layer counts
- Required shipping documents, including COA, packing list, bill of lading, and customs invoice
- Delivery date and port or warehouse address
- Inspection or hold requirements before release
A missing drawing revision is one of the most common PO errors in glass sourcing. Suppliers managing multiple buyers may ship a previous bottle revision when the revision field is blank. Always reference the exact drawing version approved in Step 5.
Glass Liquor Bottle PO Checklist
Use this checklist as a pre-release gate. Issue the PO only after every field is confirmed.
Manage Logistics and Freight Risk
Once the supplier acknowledges the PO in writing, your freight exposure begins. If you are importing, assign a freight forwarder before the supplier books the container. Confirm pallet height and container loading plan against the supplier’s carton dimensions. Mismatched pallet configurations can crush cases and create hidden breakage, which may appear only during receiving.
Track three dates throughout the shipment:
- Ex-factory date, when the supplier ships
- Port departure date
- Estimated arrival date at your facility
A delay at any point can shift your production schedule. For first-time supplier shipments, build a 10-15% buffer into the lead time.
Inspect Incoming Shipments Before You Sign Anything
Receiving inspection protects your freight claim, production schedule, and defect recovery. Inspect visible conditions before signing the bill of lading, and document any damage while the driver is still on site.
Follow this sequence:
- Photograph pallets immediately – before unloading. Capture shrink wrap condition, crushed cases, pallet orientation, and visible impact points. These photos become freight claim evidence.
- Note exceptions on the BOL – write damage descriptions directly on the bill of lading before the driver leaves. “Subject to inspection” alone may not protect you with some carriers.
- Pull a statistically meaningful sample – for a 500-case shipment, inspect at least 32-50 cases using ANSI/ASQ Z1.4 sampling tables. Checking 5 cases from a 500-case shipment is not a receiving inspection.
- Quarantine questionable cases – separate them before releasing stock to production. Keep inspected and uninspected inventory apart.
- Check against the PO – verify drawing revision, decoration version, case pack count, neck finish, and tamper seal type.
- Document defect types – classify issues as cosmetic, functional, or critical. Scuffs and minor surface marks are cosmetic. Chipped finishes and dimension variance are functional. Cracks and closure incompatibility are critical.
Accept mixed revisions only with written supplier authorization. If boxes from two drawing revisions arrive on the same pallet, segregate and hold them. Mixed revisions can cause fill-line errors, label mismatches, and compliance exposure.
Stable Storage Prevents Silent Shrink
After receiving, storage discipline protects margin. Poor stacking, temperature swings, and weak rotation can turn approved inventory into hidden loss before bottles reach the line.
- Stack standard 750mL bottle pallets no more than two high.
- Single-stack large formats, including 1750mL bottles.
- Store bottles in a dry, temperature-stable environment.
- Avoid cold-to-hot cycles that can create micro-cracks in glass that appears intact.
- Use FIFO rotation so old stock does not sit behind new receipts.
A single tipped pallet can write off 300-500 bottles. The cost extends beyond replacement glass. It also includes production downtime while you wait for replenishment.
The Next Revenue Channel: Personalization, Refill, and Reuse
The next growth channel for Glass Liquor Bottles is not only packaging. It is in-store personalization, refill programs, and reuse campaigns. Treat the PO stage as the start of that revenue strategy, not just an inventory event. The decisions you make now affect engraving compatibility, refill safety, tamper-seal replacement, and sustainability claims later.
In-store personalization – Laser engraving and screen-printed bottles sold at point of sale can carry a 15-30% price premium over standard-labeled product in on-premise and direct-to-consumer channels. Distilleries and hospitality groups that specify engraving-compatible glass in the initial PO avoid costly re-sourcing later. Common options include borosilicate or high-clarity flint with smooth panel sections.
Refill programs – Bars and distilleries in several U.S. states and EU markets are piloting bottle refill programs as sustainability initiatives and margin-recovery strategies. The liability boundaries matter. A bottle returned for refilling must be sanitized to commercial standards, re-tamper-sealed, and re-labeled with a current TTB-compliant label. Generic or reused bottles that bypass tamper seals or carry altered labels create regulatory exposure for retailers, distilleries, and hospitality groups.
Reuse campaigns – Sustainability claims tied to bottle reuse require documented chain of custody. A claim that a bottle is “refilled, not replaced” without a formal sanitization and inspection protocol can expose a brand to FTC Green Guides violations in the U.S. or equivalent greenwashing rules in the EU. Before you build reuse into your PO spec, confirm the sanitization step, tamper seal replacement process, and labeling workflow.
Closure compatibility in refill programs is often underestimated. A cork or T-top closure used for the original sale may not reseal reliably after one cycle. Screw-cap and bar-top closures generally perform better across refill cycles. Specify closure type with refill intent in mind when you write the original PO, not after the program launches.
Common Mistakes to Avoid
- Signing freight paperwork before checking visible damage – this weakens or eliminates your freight claim.
- Accepting mixed revisions without documentation – this creates production and compliance risk downstream.
- Stacking bottles in unstable configurations – this causes silent shrink and production interruption.
- Leaving AQL standards off the PO – this removes the written standard needed for an enforceable defect claim.
- Launching refill or personalization programs without reviewing tamper seal and labeling requirements – this creates jurisdiction-specific regulatory exposure.
Pro tip:
- Photograph everything at arrival – pallet condition photos take two minutes and can support five-figure freight claims.
- Ask for a signed packing list inside each pallet – this makes receiving checks faster and easier.
- Quarantine questionable cases immediately – hold them outside production inventory until inspection is complete.
- Order a small personalization test run for laser engraving – 50-100 bottles can reveal differences in engraving depth and clarity by glass batch.
- Flag refill or reuse plans before issuing the PO – involve your TTB consultant or regional compliance advisor before the first return shipment arrives.
Troubleshooting Glass Liquor Bottle Procurement, Filling, and Decoration Problems
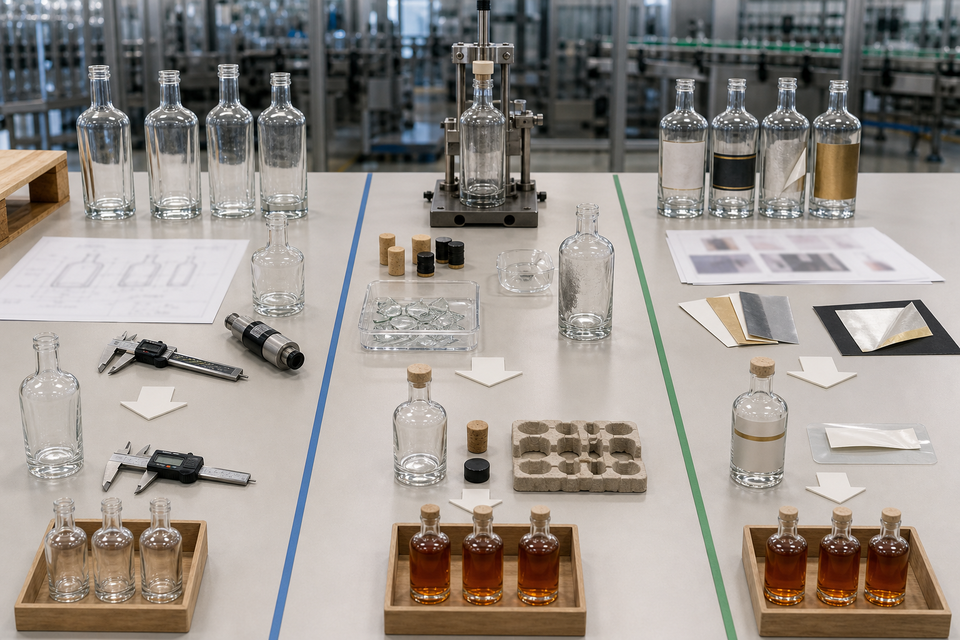
Troubleshooting Glass Liquor Bottle Procurement, Filling, and Decoration Problems
Most procurement problems with Glass Liquor Bottles can be diagnosed before they disrupt production. Failures usually trace back to five areas: closure mismatch, decoration incompatibility, packaging weakness, supplier execution, or missed commercial opportunities in personalization and reuse.
Use the problem types below to move from symptom to root cause. A structured response protects your fill schedule, customer relationships, and compliance position better than last-minute rework.
Problem 1: Bottles Leak After Filling
What’s happening: The closure is not sealing correctly against the neck finish.
Why it happens: Cork tolerances can drift ±0.5mm between batches. A T-top or bar-top cork that fit the sample bottle may fail on a production-run bottle if the neck-finish diameter shifts. Screw caps applied with inconsistent torque – even 2-3 in-lb off spec – can leak during temperature changes in transit. Fill-level errors, damaged neck finishes, and closure-bottle mismatches can create the same field failure.
How to fix it:
- Pull 10 bottles from the production run and measure neck-finish OD against your spec sheet.
- Inspect the neck finish for chips, cracks, or ovality before blaming the closure.
- Check torque calibration on your capper. Test cork-finished bottles with hand-applied and machine-applied closures separately.
- Request a Certificate of Conformance from your supplier. It should confirm neck-finish diameter against the agreed standard, such as BVS 30×60 or GPI 28-400.
Common mistake: Approving samples from a single mold cavity. Production runs use multiple cavities at once, and finish dimensions can vary 0.3-0.5mm from cavity to cavity.
Pro tip: If you use natural cork, store closures at 60-70% relative humidity. Dry corks shrink, which can cause field leaks your filling line never flags.
Problem 2: Labels Wrinkle, Lift, or Misalign
What’s happening: The label is not bonding to the bottle surface, or the bottle shape is working against the label geometry.
Why it happens: Tapered bottles create label-panel tension. Embossed surfaces reduce adhesive contact area. Residual mold-release agent or dust blocks initial adhesion. Pressure-sensitive labels applied in high humidity can absorb moisture before the bond sets. Incorrect label-panel sizing can also push the label onto a curved transition zone, where edge lift is more likely.
How to fix it:
- Confirm your label panel dimensions match the flat-face area of the bottle. Even 2mm of overlap onto a curved transition zone can cause edge lift.
- Wipe a production sample with isopropyl alcohol before labeling. If adhesion improves, the bottles likely have surface contamination from the manufacturing line.
- Ask your label supplier for adhesive specs matched to your glass surface temperature at application. Cold bottles from a refrigerated warehouse need a different tack profile than ambient fills.
Common mistake: Ordering labels before confirming bottle geometry with a physical sample. Supplier spec sheets list label-panel height and width, but they rarely account for taper angle or emboss depth.
Pro tip: For frosted or matte-finish bottles, specify UV-cure ink or a label adhesive rated for low-energy surfaces. Standard pressure-sensitive labels can lose 30-40% bond strength on coated glass.
Problem 3: Bottles Break During Shipping
What’s happening: Breakage at the customer or distributor creates a compliance and brand problem, not just a freight claim.
Why it happens: Single-wall corrugated cartons compress under pallet weight. Bottles with high shoulders or long necks, common in whiskey and gin formats, concentrate stress at the neck-to-shoulder junction. Void space inside cartons allows bottles to shift and strike each other under road vibration. Poor palletization and rough LTL handling add more impact points.
How to fix it:
- Test your carton under ISTA 2A or ASTM D4169 before committing to a shipping configuration. Testing takes 2-3 days and identifies failure modes before a full run ships.
- Specify divider inserts – corrugated cell dividers, molded pulp, or foam – based on bottle weight. Bottles above 600g empty weight need cell separation, not just layered cardboard.
- For LTL freight, add edge board and stretch-wrap reinforcement to every pallet tier. LTL trailers are loaded and unloaded multiple times, so the shock profile is harsher than full truckload.
Common mistake: Using carton configurations designed for wine bottles on spirits bottles. Spirits formats vary more in neck length and shoulder geometry. Wine carton inserts often leave 8-12mm of lateral clearance, enough for fracture under vibration.
Pro tip: Breakage above 0.5% of units shipped is usually recoverable through better packaging. Breakage above 2% signals a structural spec issue – glass thickness, carton design, or both – that repackaging alone will not solve.
Problem 4: Laser Engraving Chips or Creates Poor Contrast
What’s happening: The engraving removes material unevenly, chips at the edges, or produces a gray smear instead of crisp contrast.
Why it happens: Soda-lime glass responds differently to laser energy than extra-flint or borosilicate. Coated or frosted bottles add another variable because the laser hits the coating first, then the glass beneath it. Excessive power can create chipping or micro-fractures. Poor fixture alignment causes the focal point to drift across a curved surface, creating inconsistent depth. Inadequate cooling or ventilation can also affect finish quality.
How to fix it:
- Send three bottles to your engraving vendor before production. Ask whether they have test data for your glass composition. Flint glass and extra-flint glass have different silica density profiles, so settings that work on one may chip the other.
- Request a power/speed test matrix, typically 5×5 pass settings, before locking the final file. This takes 30-60 minutes and removes guesswork.
- For curved surfaces, confirm your vendor uses a rotary fixture, not a flat platen. Flat platens introduce focal-distance errors on any bottle diameter above 65mm.
- Confirm the engraving setup includes adequate cooling and ventilation, especially on coated or frosted bottles.
Common mistake: Assuming “works on glass” means “works on your glass.” Coatings, colorants, and glass composition vary by supplier and country of origin.
Pro tip: Laser engraving produces micro-fractures at high power settings. For bottles intended for refill programs or repeated handling, run a drop-impact test on 10 engraved bottles and 10 unengraved blanks. If engraved bottles break at a lower drop height, reduce laser power and compensate with additional passes.
Problem 5: Supplier Lead Time Slips
What’s happening: Your supplier misses the delivery window, and your production or launch schedule absorbs the delay.
Why it happens: Stock bottle suppliers can run out of a format faster than they reorder. Custom mold runs are scheduled in production blocks, and a mold outside the queue can add 8-16 weeks minimum. Port congestion, customs holds, and ocean freight booking windows can add 2-6 weeks on top of factory lead time. Unrealistic reorder timing makes these delays harder to absorb.
How to fix it:
- Confirm whether your bottle is a stocked SKU or a scheduled-production item before placing the order. Stocked items ship in days; scheduled-production items run on 10-16 week cycles.
- Build a 6-8 week buffer into your reorder point. Many buyers reorder when stock hits 4 weeks of remaining inventory, which leaves no margin for a customs delay or vessel change.
- Identify a domestic backup supplier for your closest-matching format. It costs more per unit, but a domestic emergency order at a $0.30-$0.50 premium per bottle is cheaper than a halted fill line.
- For custom bottles, confirm mold availability before you commit to a launch date.
Common mistake: Treating the supplier’s quoted lead time as guaranteed. Lead times are estimates based on current factory load. Orders placed during peak season, especially Q3-Q4, often stretch beyond the original estimate.
Pro tip: Ask your supplier for production slot confirmation in writing, not only an order acknowledgment. A production slot confirmation specifies the week your bottles enter the factory schedule. An order acknowledgment only confirms receipt of your purchase order.
The Opportunity Most Buyers Miss: Personalization, Refill, and Reuse
The next growth channel for glass liquor bottles is not just packaging. It is in-store personalization, refill programs, and reuse campaigns. Retailers, hospitality groups, and craft distilleries are generating incremental revenue and measurable loyalty by treating the bottle as a customer experience platform, not a commodity container.
Three formats are gaining traction:
- Laser-engraved personalization at point of sale – Retailers engrave names, dates, or custom text on-site with compact desktop engravers. Margin uplift per bottle: $15-$40, depending on format. This requires flint or extra-flint glass, confirmed coating compatibility, and trained staff.
- Refill programs for premium spirits – Customers return the original bottle for a discounted refill of a house blend or featured spirit. This requires a documented sanitization protocol, such as hot caustic wash or commercial glasswasher at 82°C minimum rinse temperature. It also requires a tamper-evident reseal and TTB/state compliance review for any labeling changes.
- Reuse campaigns tied to sustainability claims – Deposit-return or branded-return programs allow distilleries to reclaim glass, reduce packaging cost, and generate marketing equity. Liability boundaries must be clear: bottles returned in damaged condition must be recycled, not refilled.
Compliance and liability boundaries matter. Retailers refilling bottles without TTB authorization may operate in legal gray territory or violation, depending on the state. Hospitality groups serving spirits from unmarked or relabeled bottles risk license exposure. Distilleries making sustainability claims on refillable packaging need documentation before those claims can withstand scrutiny. That documentation should cover glass-cycle tracking, fill count limits per bottle, and inspection criteria.
Screen-printed bottles – also called applied ceramic labeling, or ACL – support sustainability messaging better than paper labels because they avoid label waste and adhesive residue that can complicate recycling or sanitation. The tradeoff is minimum order quantity. ACL usually requires 5,000-10,000 units per design, and design changes require a new firing run.
Build your personalization or reuse program around bottles you have already qualified for your fill line. Sourcing a second bottle format for a campaign can increase testing cost and MOQ exposure until the economics no longer work.
When to Request Samples – and What to Test
Buyers often request samples too late or test too little. Use samples to verify the failure points that can interrupt filling, decoration, shipping, or reuse.
Order 3-5 samples minimum per test category. Approval from a single bottle tells you nothing about batch consistency.
Every failure mode above has a clear diagnostic path. Buyers who protect production schedules and build commercial programs around Glass Liquor Bottles run structured tests before problems appear, not after.
Advanced Tips for Optimizing Glass Liquor Bottle Programs
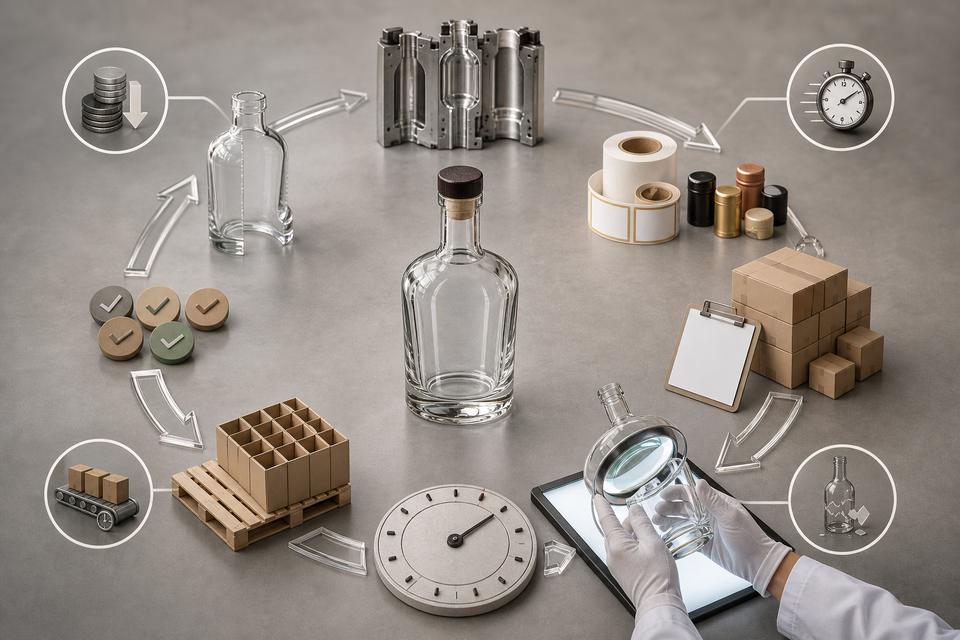
Advanced Tips for Optimizing Glass Liquor Bottle Programs
The next growth channel for Glass Liquor Bottles is not packaging alone. It is the customer experience built around the bottle. In-store personalization, refill stations, and reuse campaigns already create incremental revenue for forward-thinking distilleries and hospitality groups. Those opportunities also bring compliance, safety, and liability exposure that many procurement guides overlook.
Mature buyers look beyond basic sourcing. They optimize bottle programs across cost, brand impact, compliance, and sustainability before the first production order creates downstream risk.
Build a Supplier Scorecard Before You Need One
Stop ranking suppliers by unit price alone. Build a scorecard that weighs total landed cost, on-time delivery rate, defect rate, sample turnaround, documentation quality, customization capability, and emergency responsiveness.
A supplier that charges $0.12 less per bottle can still cost more if it delivers a 4% defect rate and a 14-week lead time. A full-price supplier with a 0.5% defect rate and a 6-week cycle may protect margin better. Run the math before you commit volume.
Pro tip: For any supplier under consideration for more than 10,000 units per month, request three cycles of actual delivery records. References help, but performance data gives you a stronger basis for comparison.
Dual-Source Before You Have a Crisis
Single-sourcing a high-volume bottle creates risk that many buyers discover only after a production stoppage. Dual sourcing works only when your secondary supplier matches your primary on neck finish, label panel dimensions, closure torque spec, and visual weight.
Minor differences across suppliers can trigger label registration failures, closure torque problems, and retailer chargebacks. Qualify the secondary supplier through the same sample-testing protocol as the primary. Use the same fill test, label application, and closure pull test before assigning backup volume.
Forecast Forward, Not Backward
Historic averages often understate demand spikes. Build your bottle forecast from current commercial and production signals:
- Production schedule – confirmed batch runs and available tank capacity
- Distributor commitments – signed volume agreements, not informal projections
- Seasonal and holiday windows – holiday gifting can lift bottle demand 30-50% in Q4 for premium spirits SKUs
- Launch campaigns – new expressions, limited editions, or regional rollouts that require unique bottle formats
Lead time turns forecasting into a procurement risk. With a 10-week ocean freight cycle, a Q4 holiday order may need to ship in late July. That calendar pressure supports a forward-looking forecast model instead of a simple reorder based on last year’s average.
Standardize Closures and Label Sizes Across SKUs
Every unique closure type and label size adds inventory exposure. A bar or distillery running five SKUs with five different neck finishes needs five closure SKUs, five label die lines, and five reorder triggers.
Standardize where the product allows it. If your gin and vodka can share a 750mL flint bottle with the same GPI neck finish and a 3.5″ x 4″ label panel, you reduce two procurement lines to one. You also cut emergency sourcing risk in half.
Sustainability: Sequence Your Options Before Defaulting to Reuse
Reuse programs send a strong marketing signal, but they add operational complexity. Before committing to a refill program, evaluate lower-friction sustainability options first:
- Lightweighting – reducing glass weight by 10-15% cuts freight cost and carbon per case without changing your fill line
- Recycled-content glass (PCR) – 15-30% post-consumer recycled content is commercially available from several domestic and European suppliers and supports sustainability claims without a process overhaul
- Local sourcing – shifting from imported to domestic glass can cut transport emissions 20-40%, depending on origin
- Improved pallet utilization – optimizing case stack height and pallet configuration reduces shipments per unit
Reuse becomes the right answer when customer dwell time, brand equity, and regulatory permission align. It is rarely the first sustainability move to test.
In-Store Personalization: Revenue Opportunity With Hard Limits
Laser engraving and screen printing on glass bottles can generate meaningful revenue for premium spirits retailers and distilleries. A laser-engraved bottle at retail can command a $15-$40 premium over a standard label bottle in the same SKU. Once the engraving line is in place, incremental cost is limited.
What works:
- Laser engraving – permanent, no-ink decoration that works best on flint and extra-flint glass; borosilicate engraves cleanly but is rarely used for spirits
- Screen printing (applied ceramic label / ACL) – decoration fused directly into glass during manufacturing; no label peel, no moisture failure, and strong shelf presence
- In-store personalization kiosks – point-of-sale engraving for gift purchases; requires a durable glass surface and a clear zone in the bottle spec
Where compliance limits apply: Any modification to a sealed, tax-strip-affixed bottle after it leaves a licensed facility may constitute repackaging under TTB regulations in the United States. That includes re-engraving, re-labeling, or adding decorative closures.
Retailers and hospitality groups should consult their state ABC authority and TTB-licensed supplier before launching an in-store modification program. Liability for mislabeling or tampering with tamper-evident seals sits with the party that breaks the original seal.
Refill and Reuse Programs: What the Compliance Boundary Actually Looks Like
Refill programs are expanding in European markets and select U.S. jurisdictions, but the liability framework remains uneven. Use the program type to identify who can execute it and where the risk sits.
Sanitization is the unspoken liability. A glass bottle returned for refill must be sanitized to commercial food-safety standards before reuse. For distilleries, that means documented wash-and-inspect protocols.
Hospitality groups that repurpose bottles as carafes or decanters should remove the original spirits label and void the tamper seal before service. Otherwise, the bottle may imply a sealed, taxed product.
Choosing the Right Bottle Style by Spirit Category
Most sourcing guides show SKUs. Few explain the functional logic behind format choices. Use the category to narrow the bottle shape, closure, and presentation before requesting samples.
Vodka: Tall, clean silhouettes, such as Nordic or cylindrical formats, in flint glass. Clarity is the brand signal. Avoid embossing that distorts the pour view.
Whiskey (bourbon, Scotch, rye): Heavier base, shorter shoulder, and amber or flint glass. Weight communicates premium positioning. Bartop or T-top closures are standard for craft, while screw caps are common for volume.
Tequila: Wide-shoulder, slightly squat profiles in flint glass. Agave embossing and cork or synthetic bartop closures are category conventions that support shelf fit.
Gin: Apothecary-style or botanical-curve formats in flint glass. ACL decoration and wax dip closures are rising in premium segments.
Liqueurs: High variation by use case. Tall, narrow formats support pouring products, while wide-base formats suit gifting. Label panel size is critical because liqueur labels carry more mandatory text than most spirits.
Miniatures (50mL): Neck finish and closure compatibility are the main spec concerns. Many 50mL bottles use proprietary finishes. Confirm that your closure supplier supports the exact GPI spec before ordering volume.
Closure Compatibility: The Field Problem Nobody Explains
Closure failures in the field – leaking corks, spinning screw caps, and cracking bartops – usually trace back to one of three root causes:
- Neck finish mismatch – the GPI/ROPP finish on the bottle does not match the closure manufacturer’s tolerance
- Torque spec error – the closing head on the fill line applies incorrect torque for the closure material
- Cork moisture and storage failure – natural corks stored in low-humidity environments before insertion can shrink and seal poorly
Cork vs. synthetic T-top: Natural cork breathes and is preferred for aged spirits, but natural cork taint (TCA) remains a risk at scale. Synthetic T-tops eliminate TCA and stay consistent across humidity ranges. They are often the better choice for volume SKUs and hospitality programs where bottles sit in storage.
Tamper-evident caps: A heat-shrink capsule or perforated band over the closure satisfies TTB requirements and most retailer requirements for sealed product. Specify the capsule material – PVC, polyolefin, or tin – in your bottle spec. Do not leave it to the decoration stage.
What to Test When You Request Samples
Sample orders should prove that the bottle works on your line, with your closure, label, and tamper seal. Most buyers stop at visual inspection. A stronger protocol covers the failure points that appear after production starts.
- Closure torque test: Apply the closure at your line’s specified torque. Check for thread strip, cap spin-off, and seal integrity after 48 hours at room temperature.
- Fill-line drop test: Drop-test five bottles at your standard carton drop height, typically 30 inches. Record the breakage pattern. Base fracture indicates thin-wall spec; neck fracture indicates fill-line impact.
- Label adhesion test: Apply your label stock under normal conditions. Store at 38°F, the standard cold-chain temperature, for 72 hours. Check for peel, bubble, and edge lift.
- Engraving test: If personalization is part of your program, engrave two bottles. Inspect for micro-fracture along the engraving path, which is more common in thin-wall bottles under 3mm.
- Tamper seal integrity: Apply your heat-shrink capsule and check for full adhesion around the neck profile. Irregular neck profiles can create capsule gaps that fail retailer inspection.
Time required: A complete sample test protocol takes 5-7 business days when tests run concurrently. Compressing the process to 48 hours can miss cold-chain label failures and closure seal drift.
The Scorecard in Practice
Build a one-page supplier scorecard before your next RFQ. Use weighting to compare suppliers on performance, not just price.
Score each shortlisted supplier before you request production quotes. A supplier that wins on price but scores poorly on documentation and defect rate will cost more than the unit price difference before your second production run.
Conclusion
Choosing a Glass Liquor Bottles program starts with fit, not the lowest quoted unit price. The right program matches your use case, passes compliance review, supports your closures and filling process, and arrives on schedule. It also performs consistently through storage, decoration, shipping, and retail handling. To make that choice with confidence, turn your requirements into a written spec before issuing a purchase order. Then compare suppliers on total delivered cost, approve physical samples, and define incoming inspection criteria. If bottles are mission-critical to your launch or production schedule, build a supplier scorecard and reorder plan upfront. That preparation helps protect timelines before delays or defects disrupt production.